You pull your steak out of the pan, and instead of that gorgeous, dark brown crust you’ve seen at steakhouses, you’re staring at a pale, grey piece of meat that looks like it took a sad bath. Sound familiar? You’re not alone, and the fix is a lot simpler than you think.
What Is a Steak Crust, Exactly?
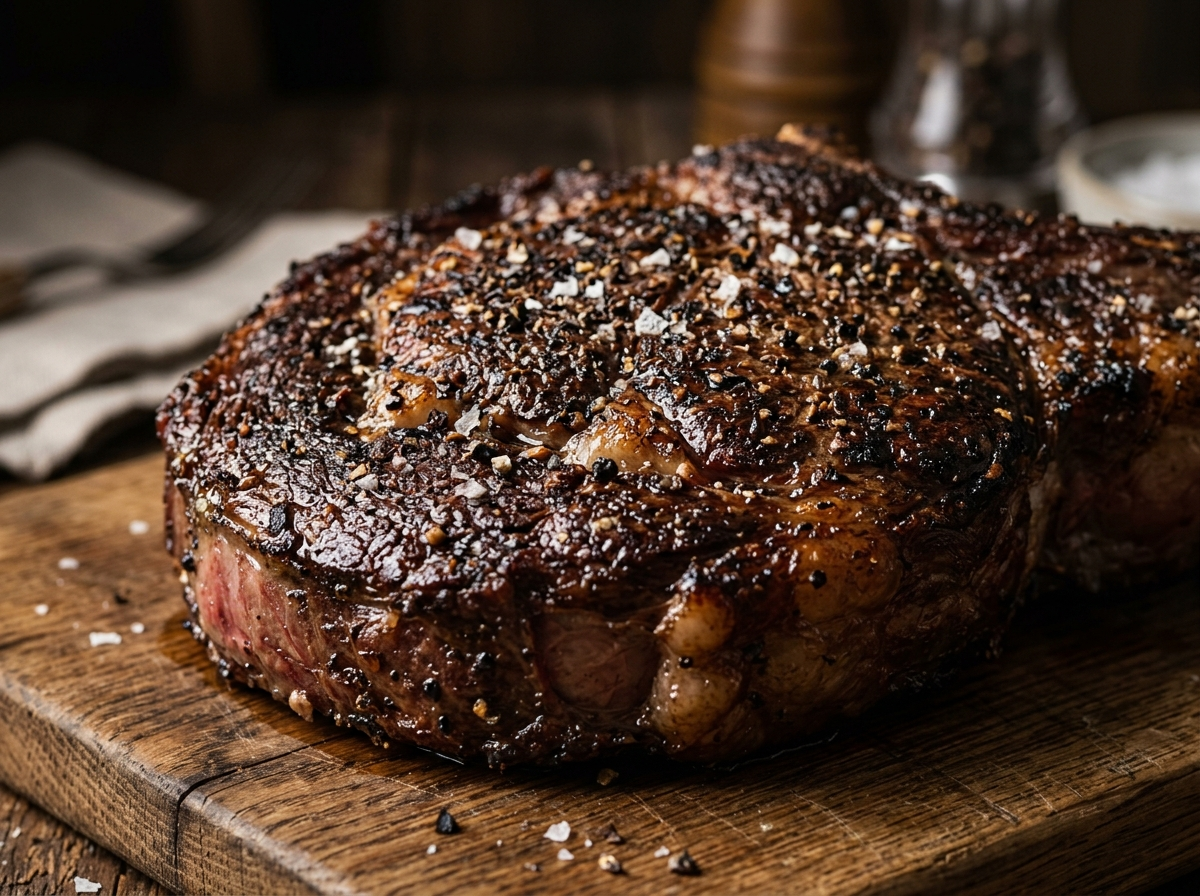
A steak crust is the thin, dark, crispy layer that forms on the outside of a steak when it hits a very hot cooking surface. It’s not burnt, and it’s not just “browned.” It’s the result of a specific chemical process called the Maillard reaction, and it’s responsible for most of the deep, savory, almost nutty flavor you associate with a great steak.
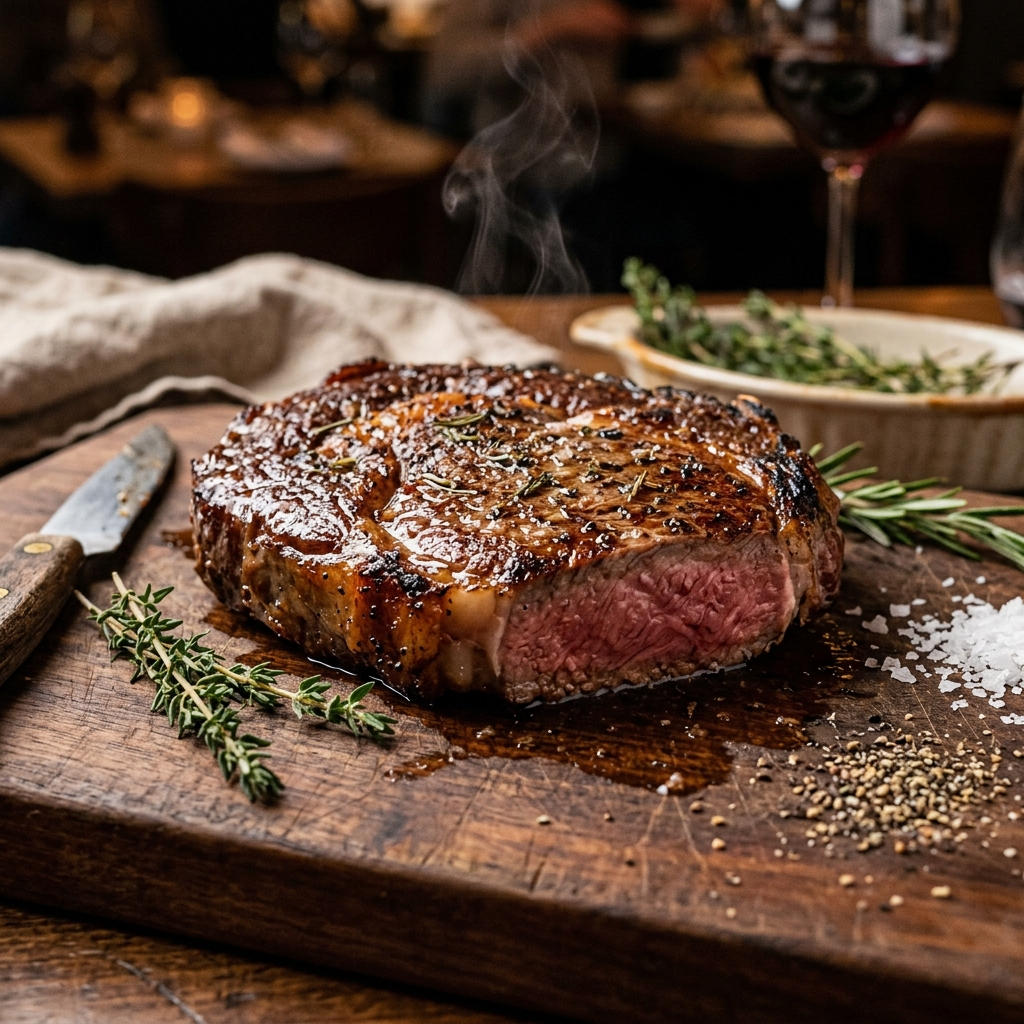
Here’s what’s actually happening at the molecular level. The surface of your steak is covered in amino acids (the building blocks of protein) and small amounts of natural sugars. When those compounds are exposed to dry heat above roughly 280°F, they start rearranging themselves into hundreds of new flavor and aroma molecules. That’s the Maillard reaction, named after the French chemist Louis-Camille Maillard who first described the process back in 1912. Harold McGee covers this extensively in his landmark book On Food and Cooking, and it’s the same reaction that gives bread its golden crust, roasted vegetables their dark edges, and a seared burger that irresistible color.
The crust itself is typically only a millimeter or two thick, but it punches way above its weight in flavor. That thin layer is where most of the umami richness lives — the deep, savory taste that makes your mouth water. If you want to understand more about why that savory quality matters so much across all kinds of cooking, our piece on what umami flavor actually is breaks it down in detail.
One thing worth clearing up right away: the Maillard reaction is not the same as caramelization. Caramelization involves only sugars breaking down at higher temperatures, usually around 320°F and above. The Maillard reaction involves both amino acids and sugars, kicks in at slightly lower temperatures, and produces a much more complex set of flavors. Your steak crust is almost entirely Maillard, with a little caramelization mixed in if the heat is high enough.
Why Your Steak Crust Keeps Falling Flat
If you’ve been struggling to get that perfect steak sear crust, the problem almost always comes down to one thing: moisture.
Water is the enemy of browning. Before the surface of your steak can reach the 280°F threshold where the Maillard reaction starts, every drop of water on the surface has to evaporate first. Water boils at 212°F, so as long as there’s moisture present, the surface temperature of your meat is stuck at or below that boiling point. It literally cannot get hot enough to brown. You’re steaming your steak instead of searing it, and that’s how you end up with that sad grey exterior.
This is the single biggest mistake home cooks make, and it usually shows up in one of three ways.
The steak goes straight from the fridge to the pan while still wet. Meat sits in its own juices inside the packaging, and if you don’t pat it dry, you’re dumping a thin layer of water into a hot pan. That water immediately turns to steam, drops the pan temperature, and creates a humid little cloud around the meat that prevents browning.
The pan isn’t hot enough. A lukewarm or moderately warm pan can’t overcome the moisture barrier fast enough. By the time the surface finally dries out, the inside of the steak is already overcooking, and you end up with a thick grey band of overdone meat just beneath a pale exterior. Understanding how heat affects muscle fibers in meat helps explain why that grey band forms and how to minimize it.
The pan is overcrowded. If you throw two or three steaks into a skillet at once, the temperature plummets and the moisture released by each piece creates a steam bath. You need space around each steak so the moisture can escape quickly and the pan can recover its heat.
How to Get a Crust on Steak: A Step-by-Step Breakdown
Getting a crust on steak isn’t complicated, but it does require a little patience and attention to detail. Here’s the process that works reliably, whether you’re cooking a ribeye, a strip, or a filet.
Step 1 — Dry the Surface Thoroughly
Take your steak out of the fridge at least 30 to 45 minutes before cooking. This takes the chill off the interior so it cooks more evenly, but more importantly for crust purposes, it gives the surface time to air-dry. When you’re ready to cook, grab a few paper towels and press them firmly against every side of the steak. You want the surface to feel almost tacky to the touch, not slick or wet.
If you have more time, a dry brine works even better. Salt the steak generously on all sides and leave it uncovered on a wire rack in the fridge for anywhere from a few hours to overnight. The salt initially draws moisture out, but then the meat reabsorbs it along with the seasoning. By the next day, the surface is bone dry and seasoned all the way through, which is the ideal starting point for a deep, even crust.
Step 2 — Pick an Oil With a High Smoke Point
You need a cooking fat that can handle extreme heat without breaking down and filling your kitchen with acrid smoke. Extra virgin olive oil is out — its smoke point sits around 375°F, which is well below the temperatures you need for a proper sear. Instead, reach for avocado oil (smoke point around 520°F), grapeseed oil (around 420°F), or refined safflower oil. If you’re curious about cooking with rendered animal fats, our guide on what beef tallow is and how to cook with it is a great read, since tallow has a smoke point around 400°F and adds incredible flavor to a sear.
Use just enough oil to coat the bottom of the pan in a thin, shimmering layer. You’re not deep frying — you’re creating a conductive bridge between the hot metal and the meat.
Step 3 — Get Your Pan Screaming Hot
This is where most people lose their nerve, and honestly, I get it. A pan that’s hot enough for a proper sear will smoke a little, and it will sound aggressive when the steak hits it. That’s exactly what you want.
Use a cast iron skillet if you have one. Cast iron holds heat exceptionally well and recovers quickly when you add a cold piece of meat. Place it over high heat for at least five full minutes before you add any oil. You want the metal itself to be close to 500°F. A good test: flick a tiny drop of water onto the surface. If it immediately beads up and skitters around like a marble before vanishing, your pan is ready. If the water just sits there and slowly evaporates, keep waiting.
When you lay the steak in the pan, you should hear an immediate, loud, sustained sizzle — almost a roar. If the sizzle is gentle or hesitant, the pan wasn’t hot enough. Pull the steak out, wait a couple more minutes, and try again. That initial blast of heat is what drives off the last traces of surface moisture and starts the Maillard reaction within seconds.
Step 4 — Don’t Touch It
Once the steak is in the pan, leave it alone. I know the temptation to peek, nudge, or flip early is strong, but every time you lift the steak, you interrupt the contact between the meat and the hot metal. That contact is what builds the crust.
For a steak that’s about an inch thick, let it sear undisturbed for roughly two to three minutes on the first side. You’ll know it’s ready to flip when the edges start to look browned and the steak releases easily from the pan. If it’s sticking, it’s not ready — the crust hasn’t fully formed yet, and the meat will release on its own once it does.
Flip once, sear the other side for a similar amount of time, and then you can add butter, garlic, and fresh herbs for a quick baste if you like. But the crust itself is built during those first few minutes of uninterrupted contact.
Quick tip: If you’re cooking a thicker steak (over 1.5 inches), consider the reverse sear method. You gently cook the interior in a low oven first, then finish with a blazing hot sear at the end. This gives you edge-to-edge pink with a killer crust and almost no grey band. Our breakdown of carryover cooking and what happens after you pull meat off the heat explains why this method gives you much better control over the final internal temperature.
The Best Steaks for Building a Crust
Not all cuts sear equally well. The best steaks for a deep, even crust are the ones with a relatively flat surface and good thickness. A thick-cut ribeye, a New York strip, or a porterhouse all give you plenty of surface area to work with and enough internal mass that the center won’t overcook while you build the crust.
Thinner steaks like skirt or flank can still develop a nice sear, but you have to work faster and use even higher heat because the window between “crusty outside, rare inside” and “overcooked all the way through” is razor thin. The principles are the same — dry surface, screaming hot pan, don’t crowd — but your margin for error shrinks considerably.
Avoid steaks with a lot of surface irregularities or heavy silverskin on the outside. The crust forms best on smooth, flat muscle, which is another reason why a well-trimmed strip or ribeye is the go-to choice for searing.
Cast Iron vs. Grill vs. Reverse Sear: Which Method Wins?
The method you choose affects the type of crust you get, and each has real strengths depending on your setup and the cut you’re cooking.
Cast iron on the stovetop gives you the most consistent, edge-to-edge crust because the entire surface of the steak is in direct, flat contact with the hot metal. This is the method most restaurant kitchens use for a reason, and it’s the easiest to control at home. The downside is smoke — you will probably set off your smoke alarm if you don’t have good ventilation. Open a window, turn on the exhaust fan, and maybe warn whoever else lives with you.
A screaming hot grill gives you a crust with those classic char marks and a slightly smokier flavor from the drippings hitting the flames. The trade-off is that the grate only contacts the steak in narrow lines, so you get stripes of deep crust alternating with less-browned areas. You can minimize this by using a plancha or a flat-top griddle on the grill, which gives you full surface contact similar to cast iron. For a full walkthrough of grilling technique, check out our guide on how to grill steak for temperature and timing details.
The reverse sear is the best option for thick steaks (1.5 inches and up). You start the steak in a 250°F oven until the internal temperature reaches about 10 to 15 degrees below your target, then finish it in a ripping hot cast iron pan for 60 to 90 seconds per side. The result is a stunning crust with a perfectly even interior and almost zero grey overcooked band. It takes longer, but the results genuinely speak for themselves.
No matter which method you choose, remember to let the steak rest after cooking. Resting allows the juices to redistribute through the meat so they don’t all pour out the moment you cut into it. Our article on why resting meat matters explains the science behind this step and how long you actually need to wait.
A note on food safety: The USDA recommends cooking whole cuts of beef to a minimum internal temperature of 145°F followed by a three-minute rest (USDA safe handling guidelines). If you prefer your steak rarer than that, understand that you’re accepting a small degree of additional risk. Use a reliable instant-read thermometer to know exactly where your steak stands, and source your meat from a trusted butcher when eating below the recommended temperature. This is general guidance, not a substitute for professional food safety advice.
Frequently Asked Questions
What is the crust on a steak called?
The crust on a steak is most commonly called the sear or the Maillard crust, named after the chemical reaction that creates it. Some cooks also refer to it as the “bark” when talking about heavily seasoned steaks, though “bark” is more traditionally associated with slow-smoked barbecue. There’s no single official term, but if you tell a chef you want a “hard sear,” they’ll know exactly what you mean.
Why won’t my steak get a crust?
The most common reason is surface moisture. If your steak is wet when it hits the pan, the water has to boil off before browning can begin, and by that time the pan has cooled down and the meat starts steaming. Pat your steak completely dry with paper towels, make sure your pan is genuinely hot (not just “medium-high” hot), and don’t crowd the pan. Those three fixes solve the problem for most home cooks almost immediately.
Should I salt my steak before or after searing?
Salt before, and ideally well before. Salting right before the steak hits the pan is perfectly fine and won’t hurt your crust, but salting 45 minutes to 24 hours ahead (dry brining) gives you a drier surface and deeper seasoning, both of which improve the crust. The old advice that salting early “draws out moisture and prevents browning” is misleading — yes, salt initially pulls moisture to the surface, but that moisture either evaporates or gets reabsorbed within about 40 minutes, leaving you with a drier, better-seasoned steak.
Can I get a good crust on a gas grill?
You can, but it takes more effort than cast iron. Preheat the grill on high for at least 15 minutes with the lid closed so the grates get extremely hot. Pat the steak dry, oil the grates lightly, and resist the urge to flip early. The crust won’t be as uniform as what you get in a flat pan because the grates only touch the meat in narrow lines, but you’ll still get good browning and a nice smoky flavor that you simply can’t replicate indoors.
The next time you cook a steak, focus on the three things that actually matter: a dry surface, a screaming hot pan, and the patience to leave the meat alone for a few minutes. You don’t need fancy equipment or a culinary degree to get that deep, dark, restaurant-quality crust. You just need to let the Maillard reaction do its thing.
Fire up that cast iron, pat your steak dry, and listen for the roar when the meat hits the metal. That sound is the crust forming, and it’s one of the best sounds in cooking.