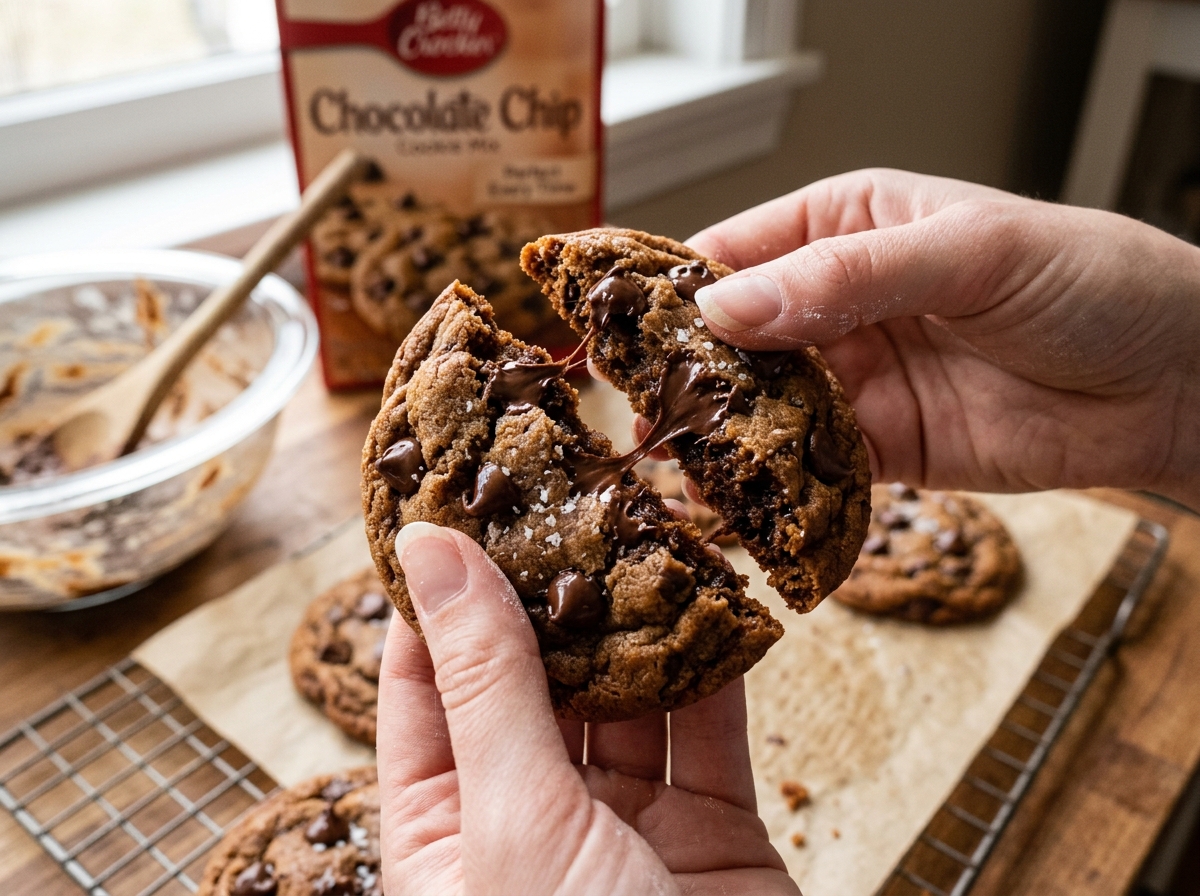
About 70% of home bakers who use cookie mix end up disappointed at least once. Flat cookies. Dry cookies. Weirdly crunchy edges with raw centers. Sound familiar? The box makes it look foolproof — just add butter, an egg, and stir. But that “foolproof” promise leaves out a bunch of small details that actually matter a lot.
Here’s the thing: cookie mix isn’t a shortcut to bad cookies. It’s a shortcut to great cookies — if you know how to handle it. A few tiny adjustments in how you measure, mix, and bake can turn that $4 box into something your friends think came from a bakery. And no, you don’t need pastry school training or fancy equipment.
This guide breaks down everything you need to know to bake perfect cookies from mix, every single time. We’re talking about the stuff the box doesn’t tell you — the real reasons cookies go wrong, and exactly how to fix them.
Why Cookie Mix Fails (And It’s Usually Not the Mix’s Fault)
Let’s get one thing straight. Cookie mixes from brands like Betty Crocker, Duncan Hines, and Pillsbury are designed by food scientists. The dry ingredients — flour, sugar, leavening agents, salt — are already measured and balanced. So when your cookies turn out weird, the mix usually isn’t the problem. You are.
That sounds harsh, but it’s actually good news. Because it means the fix is in your hands.
The most common reasons cookie mix disappoints come down to three things: wrong fat temperature, overmixing, and oven issues. That’s it. Three things. Master those, and you’re already ahead of most home bakers.
Think of cookie mix like a head start in a race. You’ve skipped the hardest part — measuring and balancing dry ingredients. But you can still trip at the finish line if you don’t pay attention to the last few steps.
What the Box Instructions Get Right (And What They Skip)
The back of every cookie mix box gives you the basics. Add softened butter, an egg, mix it up, scoop onto a baking sheet, bake at 350°F for 10–12 minutes. Simple enough.
What those instructions get right is the ratio. The amount of butter and eggs listed on the box was tested to work with that specific mix. Don’t mess with the ratios unless you know what you’re doing (we’ll talk about smart upgrades later).
But here’s what the box skips entirely:
Butter temperature matters more than you think. “Softened butter” is vague. Too soft, and your cookies spread into flat, greasy discs. Too cold, and they’ll stay thick and dense. The sweet spot is around 65–68°F — the butter should hold its shape but give easily when you press a finger into it. If you can bend the stick without it cracking or collapsing, you’re in the zone.
Mixing time isn’t mentioned. The box just says “stir until combined.” But how long you mix dramatically affects texture. Overmixing develops gluten in the flour, which makes cookies tough and cakey instead of chewy. You want to mix just until the dry streaks disappear — usually 30 to 45 seconds of gentle stirring with a wooden spoon or spatula. Stop before it looks “perfectly smooth.”
Resting the dough isn’t suggested. Almost no cookie mix box tells you to chill the dough. But 30 minutes in the fridge changes everything. Cold dough spreads slower in the oven, which means thicker, chewier cookies with better shape. This one step alone fixes the #1 complaint people have about mix cookies — that they turn out too flat.
The Butter Factor: Your Most Important Ingredient
You already have butter in your fridge. But the way you prep that butter determines about 60% of your cookie’s final texture. That’s not an exaggeration.
Room temperature butter (around 67°F) creams properly with sugar, creating tiny air pockets that give cookies their soft, slightly puffy texture. If your kitchen is warm — say it’s summer and your house is 78°F — your butter might be too soft before you even realize it. In that case, cut the butter into cubes and pop it in the fridge for 5 minutes before mixing.
Melted butter changes the whole game. Some bakers actually prefer it for a denser, chewier cookie. If that’s your thing, go ahead and melt it — just let it cool down for a few minutes before adding it to the mix. Hot melted butter will partially cook the egg and create a scrambled-egg-cookie situation that nobody wants.
Cold butter straight from the fridge is too firm. It won’t blend evenly into the dry mix, leaving you with lumps and inconsistent texture. Some chunks will melt faster in the oven than others, giving you cookies that are partly overdone and partly underdone.
A quick test: press your thumb into the butter stick. If it leaves a clear indent without the butter squishing out sideways, you’re perfect.
Eggs: Small Details, Big Difference
The box says one egg. Sometimes two. Seems simple — crack it in and move on, right?
Not so fast. Egg temperature and size actually affect your results.
Use room temperature eggs. A cold egg straight from the fridge can firm up your softened butter on contact, creating small lumps in the dough. Pull your eggs out about 20 minutes before baking. If you forgot, place the whole egg (in its shell) in a bowl of warm water for 5 minutes. Problem solved.
Size matters. Cookie mix recipes are formulated for large eggs. If you grab a medium egg, you’re adding less moisture and less fat (from the yolk). That means drier, crumblier cookies. Extra-large eggs add too much moisture, making cookies spread more. Stick with large.
Here’s a trick professional bakers use: if you want chewier cookies, add an extra egg yolk on top of what the box calls for. The extra fat from the yolk adds richness and chew without making the dough too wet. The whites are what make cookies cakey, so skipping the extra white keeps things dense and chewy.
Mixing: Less Is More (Seriously)
If there’s one universal rule for cookie dough — whether from scratch or from a mix — it’s this: stop mixing sooner than you think you should.
Flour contains proteins that form gluten when mixed with liquid and agitated. A little gluten gives cookies structure. Too much makes them tough, dense, and almost bread-like. You know those cookies that come out thick but hard, almost like biscuits? Overmixing is usually the culprit.
With cookie mix, the dry ingredients are already blended. You don’t need to mix them together. All you’re doing is incorporating the wet ingredients (butter, eggs, maybe vanilla) into the dry mix.
The best approach is to use a wooden spoon or silicone spatula — not an electric mixer. Hand mixing gives you more control and makes it nearly impossible to overmix. Fold the dough gently, scraping from the bottom up, until you don’t see dry powder anymore. Some small streaks are actually fine. They’ll hydrate as the dough rests.
If you do use a stand mixer or hand mixer, keep it on the lowest speed and mix for no more than 20–30 seconds after adding the dry mix. The moment it looks like dough, stop. Walk away. Resist the urge to give it “just a few more seconds.”
The Chill Step Most People Skip
Here’s where you gain a serious edge over everyone else baking from the same box.
After mixing, wrap your dough in plastic wrap or put the bowl in the fridge with a cover. Let it chill for at least 30 minutes. One hour is even better. Overnight? Now you’re cooking (well, baking).
What chilling does is threefold. It solidifies the butter, so the dough holds its shape longer in the oven before the fat melts. This prevents spreading and gives you thicker cookies. It also allows the flour to fully absorb the liquid, which improves texture. And something interesting happens at the flavor level — the sugar begins to dissolve more evenly into the dough, producing a slightly more complex, toffee-like taste when baked.
The difference between chilled and unchilled dough is honestly dramatic. Side-by-side, the same mix will produce a flat, pale cookie (unchilled) versus a thick, golden, chewy one (chilled). It’s the single easiest upgrade you can make, and it costs you nothing except a bit of patience.
Pro Tip: If you’re in a rush, scoop the dough onto a baking sheet and stick the whole sheet in the freezer for 15 minutes. Not as good as a full fridge rest, but way better than baking warm dough.
Your Oven Is Probably Lying to You
This might be the most overlooked factor in home baking. You set your oven to 350°F. You trust it. But studies have shown that most home ovens are off by 15–25°F in either direction. Some are off by as much as 50°F.
An oven that runs hot will burn the bottoms and edges before the centers are done. An oven that runs cool will underbake everything, leaving you with pale, doughy cookies that collapse when they cool.
The fix is cheap and simple: buy an oven thermometer. They cost about $5–$8 at any grocery or kitchen store. Hang it on the middle rack and check the actual temperature before you bake. Adjust your dial accordingly.
Another oven mistake is opening the door too often. Every time you open it, the temperature drops 25–50°F. Your cookies need consistent heat to bake evenly. Set a timer, turn on the oven light, and peek through the window instead.
Rack position also matters. The middle rack is your best bet for even heat distribution. The bottom rack puts cookies too close to the heating element (hello, burnt bottoms). The top rack can over-brown the tops before the centers set.
Baking Sheets and Liners: The Unsung Heroes
Your baking sheet affects your cookies more than you’d expect.
Light-colored aluminum sheets are the gold standard. They reflect heat and bake cookies evenly. Dark or non-stick sheets absorb more heat, which means faster browning and a higher chance of burnt bottoms.
If dark sheets are all you have, drop your oven temperature by 25°F and check cookies a minute or two early.
Parchment paper vs. silicone mats — both work well, but they produce slightly different results. Parchment paper allows a bit more browning on the bottom, giving you crispier edges. Silicone baking mats (like Silpat) insulate more, producing softer, chewier bottoms. Pick whichever matches the texture you prefer.
Never grease your baking sheet with butter or oil for cookies. The extra fat causes cookies to spread too much and develop greasy, overly crispy edges. The fat in the dough itself is enough. If you don’t have parchment or a silicone mat, use the bare sheet — just let cookies cool on it for 2 minutes before removing them with a spatula.
One more thing: always let your baking sheet cool completely between batches. Placing cookie dough on a hot sheet starts the baking process immediately, which means uneven results and extra spreading. Run the sheet under cool water, dry it off, and then load up the next batch.
Timing and Doneness: Trust Your Eyes, Not Just the Timer
The box says 10–12 minutes. That range exists because every oven, every kitchen, every altitude is different. Treat the box time as a starting point, not a rule.
Here’s the real indicator of doneness: look at the cookies. You want the edges to be set and lightly golden, while the centers still look slightly underdone — almost glossy or puffy. They’ll look like they need another minute or two. Take them out anyway.
Cookies continue baking on the hot sheet for 3–5 minutes after you pull them from the oven. This carryover cooking firms up the centers perfectly. If you wait until the centers look done in the oven, you’ll end up with overbaked, hard cookies by the time they cool.
Set your timer for 2 minutes less than the minimum time on the box. Check them. If the edges aren’t set yet, give them another minute. Check again. This approach takes a little more attention, but it prevents overbaking — the #2 complaint (after flatness) that people have with mix cookies.
Did you know? Altitude affects baking time and results. If you’re above 3,500 feet, your cookies may spread more and need a higher oven temperature (by about 15–25°F) and slightly less baking time. Most cookie mix boxes have altitude adjustment instructions in small print on the side panel — check there first.
Smart Upgrades That Don’t Overcomplicate Things
One of the best parts about cookie mix is how easy it is to customize. And you don’t need to be a pastry chef to pull it off. If you’re looking for more ideas on this front, our guide on how to customize cookie mixes goes deep on creative add-ins and flavor combos.
A few simple upgrades that work with pretty much any cookie mix:
Add a teaspoon of vanilla extract. Most mixes contain artificial vanilla flavoring, which is fine but not amazing. A teaspoon of pure vanilla extract rounds out the flavor beautifully. It’s a subtle change that people notice without being able to pinpoint why the cookies taste better.
Swap some butter for brown butter. Melt your butter in a saucepan over medium heat until it turns golden and smells nutty — about 4–5 minutes. Let it cool before mixing it in. Brown butter adds a deep, caramel-toffee note that makes any basic mix taste homemade. Keep in mind that brown butter has less moisture than regular butter (the water evaporated during cooking), so your dough will be slightly drier and stiffer. That’s actually a good thing — it means less spreading.
Toss in a pinch of flaky sea salt. Not table salt — the large-flake stuff like Maldon or fleur de sel. Sprinkle a few flakes on top of each cookie right before baking. The contrast between sweet and salty is addictive, and it looks professional.
Use high-quality chocolate chips. If your mix calls for chocolate chips (or you’re adding them), swap the standard bag for something nicer. Ghirardelli, Guittard, or even chopped chocolate bars from the candy aisle make a noticeable difference. Chopped chocolate creates uneven pieces — some thin and melty, some chunky and gooey — which gives better texture and chocolate distribution than uniform chips.
Storing Cookies (And Dough) the Right Way
You baked perfect cookies. Don’t ruin them with bad storage.
Let cookies cool completely on a wire rack before storing. Warm cookies in a sealed container create steam, which makes them soggy. Once fully cool, store in an airtight container at room temperature. They’ll stay fresh for about 5 days.
Quick hack for keeping cookies soft: place a slice of white bread in the container with the cookies. The cookies absorb moisture from the bread, keeping them soft while the bread goes stale. Swap the bread slice every couple of days.
For raw dough, you’ve got options. Scoop the dough into individual cookie-sized balls, place them on a baking sheet, and freeze until solid (about 2 hours). Then transfer the frozen dough balls to a freezer bag. They’ll keep for up to 3 months. When you want fresh cookies, bake straight from frozen — just add 2–3 minutes to the baking time. No thawing needed.
This frozen dough trick is genuinely one of the best things about using cookie mix. You spend 10 minutes prepping an entire batch, and then you have fresh-baked cookies on demand for months. It’s perfect for unexpected guests, late-night cravings, or just having something warm and homemade without any effort.
If you’re thinking about gifting cookie mix with a personal touch, you might enjoy our piece on cookie mix gift ideas — it’s full of creative ways to package and personalize cookie mix for any occasion.
Troubleshooting: What Went Wrong and How to Fix It
Even with all the right techniques, things occasionally go sideways. Here’s a quick troubleshooting guide based on the most common issues.
Cookies spread too thin. Your butter was too soft or melted. The dough wasn’t chilled. Your oven might be running cool. Or you greased the sheet. Fix: chill dough longer, check oven temp with a thermometer, and don’t grease the pan.
Cookies are too thick and doughy. Your butter was too cold. Or you packed the mix too tightly when scooping from the box (dry ingredients got compressed). You might also have used a smaller egg than the recipe intended. Fix: make sure butter is properly softened, and fluff the mix with a fork before scooping.
Edges are burnt but centers are raw. Your oven runs hot, or you used a dark baking sheet, or your cookies were too close together and heat couldn’t circulate. Fix: lower oven temp by 25°F, switch to a light sheet, and leave 2 inches between cookies.
Cookies are dry and crumbly. You overbaked them or used too little fat. If you used margarine or a butter substitute instead of real butter, that could also be the problem — some substitutes have higher water content and lower fat, which throws off the texture. Stick with real, unsalted butter.
Cookies taste bland. Add vanilla extract, a pinch of salt, or try the brown butter technique. Most cookie mixes are designed to be neutral and sweet, so a little flavor boost goes a long way.
Picking the Right Cookie Mix for Your Taste
Not all mixes are equal, and which one you grab depends on what kind of cookie experience you’re after.
Betty Crocker mixes tend to produce softer, puffier cookies. They’re a solid all-around choice, especially for chocolate chip. Duncan Hines leans a bit sweeter and produces a slightly crispier edge. Pillsbury mixes often have a denser, chewier texture straight out of the box.
If you want something more premium, brands like Simple Mills offer cleaner-ingredient mixes (almond flour–based, no artificial stuff) that taste surprisingly close to from-scratch cookies. They’re pricier, but the flavor difference is noticeable.
For anyone interested in exploring artisanal or gourmet options — maybe for a special occasion or a gift — we’ve put together a guide on where to buy gourmet cookie mixes that covers some really interesting brands beyond the supermarket aisle.
The bottom line: read the back of the box. Check the ingredients list. If butter or real vanilla is listed, you’re starting from a better foundation. If the first three ingredients are all forms of sugar and the rest are chemicals you can’t pronounce, temper your expectations — or plan to do more customization to compensate.
Baking at Different Altitudes and in Different Climates
This doesn’t get talked about enough, but where you live affects how your cookies turn out.
At high altitudes (above 3,500 feet), air pressure is lower. Cookies spread faster because gases expand more quickly, and liquids evaporate sooner. Your fix: increase oven temperature by 15–25°F and reduce baking time slightly. You can also add 1–2 tablespoons of extra flour to the mix to provide more structure.
In humid climates, flour absorbs moisture from the air, which can make dough sticky and cookies cakey. If your dough feels unusually wet or slack, add flour a teaspoon at a time until it reaches a scoopable consistency.
In very dry climates, the opposite happens. Your dough might be too crumbly. Add a teaspoon of milk or an extra half-tablespoon of butter to bring it together.
These adjustments are small, but they can mean the difference between “okay” cookies and “perfect” cookies — especially if you’ve followed every other step correctly and still aren’t getting the results you want.
FAQ
Can I use oil instead of butter in cookie mix?
You can, but the results will be different. Oil produces a denser, chewier cookie with less lift. Butter contributes flavor and creates a lighter, more structured texture because it solidifies when cool (which oil doesn’t). If you’re out of butter, vegetable oil works in a pinch — use about 25% less than the butter amount called for, since oil is 100% fat while butter is about 80% fat and 20% water.
How do I make cookie mix cookies thicker?
Three things make the biggest difference: chill your dough for at least 30 minutes, use room-temperature (not overly soft) butter, and don’t flatten the dough balls before baking. You can also add an extra tablespoon of flour to the mix for more structure. Baking on a cool sheet — never a warm one — also helps cookies hold their shape.
Can I freeze baked cookies from mix?
Absolutely. Once cookies are fully cooled, place them in a single layer in a freezer-safe bag or container with parchment paper between layers. They’ll keep for up to 2 months. Thaw at room temperature for about 15 minutes, or pop them in a 300°F oven for 3–4 minutes to refresh them. They’ll taste almost as good as freshly baked.
Why do my cookies from mix taste artificial?
Most cookie mixes use artificial flavoring to keep costs low. Adding a teaspoon of real vanilla extract and a pinch of sea salt covers up most artificial notes. Using brown butter instead of regular melted or softened butter also adds depth. And choosing higher-quality mixes with simpler ingredient lists helps from the start.
Do I need to add baking soda or baking powder to cookie mix?
No. Cookie mixes already include leavening agents in the right proportion. Adding more will make cookies puff up too much in the oven and then collapse as they cool, giving you flat, wrinkled results with a bitter aftertaste (baking soda and powder taste metallic when overused).
Your Next Batch Will Be Your Best
Baking perfect cookies from mix isn’t about being a great baker. It’s about understanding the few small things that actually move the needle — butter temperature, gentle mixing, chilling the dough, and knowing your oven’s real temperature. That’s the whole playbook.
The beauty of cookie mix is that it handles the complicated chemistry for you. Your job is just to not fight it. Follow the ratios, respect the dough, and give your oven a reality check with a cheap thermometer.
Next time you tear open that pouch, try just one or two of the upgrades from this guide. The brown butter swap. The extra egg yolk. The 30-minute chill. You’ll notice the difference immediately, and so will everyone lucky enough to grab one off the cooling rack.
Now go preheat that oven.