
You pull a chicken breast out of the oven. It looks golden and beautiful. You cut into it, and — chalk. Dry, stringy, disappointing. Sound familiar?
Brining is the fix. It’s one of the easiest techniques in cooking, and it can completely change how your meat turns out. Whether you’re prepping a Thanksgiving turkey or just trying to make weeknight chicken breasts actually worth eating, knowing how to brine meat gives you a real advantage in the kitchen. Consider this your practical brining guide.
Here’s the short version: brining means soaking or coating meat in salt (and sometimes sugar and aromatics) before cooking. The salt changes the meat’s protein structure so it holds onto more moisture during cooking. That’s it. Simple concept, big payoff.
If you want the deeper science behind why this works, our piece on what a brine is and why you’d use one covers the full picture. But if you just want to get dinner on the table with juicier meat, keep reading.
What Is Brining and Why Does It Actually Work?
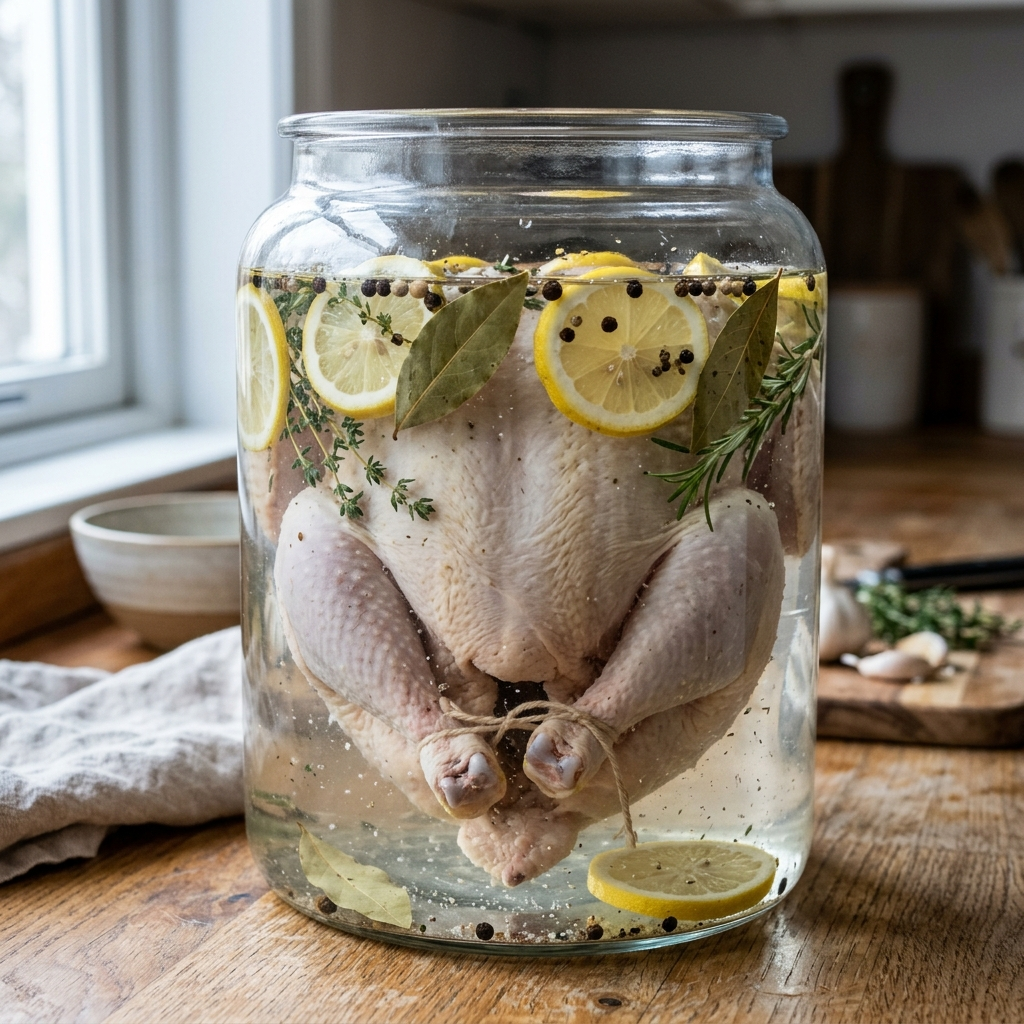
At its core, brining is about salt and water. When you submerge meat in a saltwater solution, two things happen. First, salt moves into the meat through osmosis — basically, nature’s way of balancing out the salt concentration between the brine and the muscle fibers. Second, that salt causes the proteins in the meat to loosen up and unwind slightly.
Why does that matter? Because when those proteins unwind, they create little pockets that trap water. So when you cook the meat and the heat starts squeezing moisture out (which heat always does — we explain exactly how in our breakdown of how heat affects muscle fibers in meat), a brined piece of meat has more moisture locked inside to begin with. It can afford to lose some and still taste juicy.
An unbrined chicken breast might lose 20 to 30 percent of its weight in moisture during cooking. A brined one? Closer to 10 to 15 percent. That difference is the gap between “meh” and “wow, this is actually good.”
The basic brine formula is straightforward: about 1/4 cup of kosher salt per quart of water. You can add sugar, herbs, garlic, peppercorns, or citrus if you want extra flavor, but salt and water are the only non-negotiables.
One thing to get right from the start — the type of salt matters. Kosher salt is the standard because its large, flaky crystals dissolve evenly and it’s hard to over-salt by accident. Table salt is much denser by volume, so if you use it, cut the amount in half. Our guide to choosing the right salt for the right job walks through the differences if you’re curious.
Wet Brine vs Dry Brine — Which Should You Use?
This is the big question people argue about online, and honestly, both methods work well. The right choice depends on what you’re cooking, how much time you have, and how much fridge space you can spare.
How a Wet Brine Works
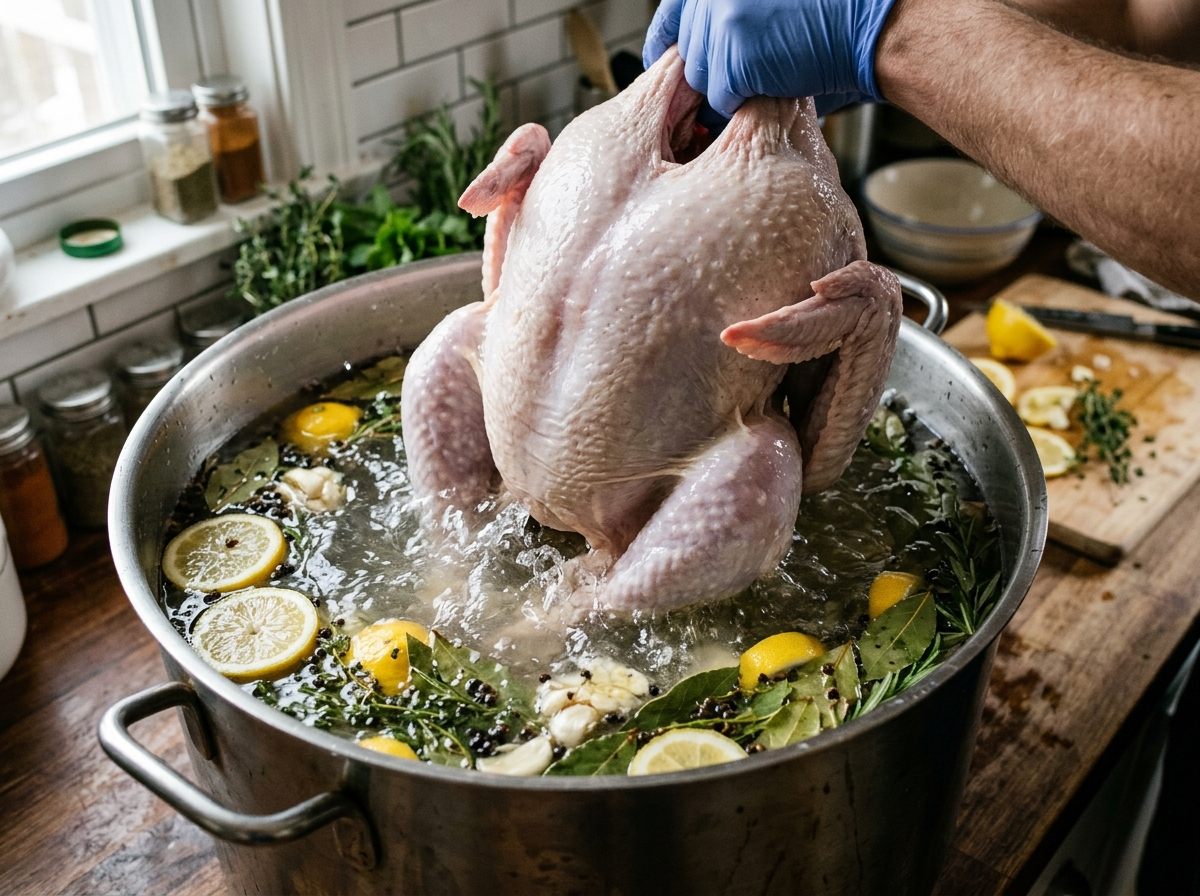
A wet brine is the classic method. You dissolve salt (and usually some sugar) in water, sometimes heating it to dissolve everything faster, then cool it completely before submerging your meat. The meat sits in this salty bath in the refrigerator for a set amount of time.
Wet brines are great for whole birds like turkey and chicken, lean pork chops, and shrimp. The liquid surrounds the meat completely, so the salt penetrates evenly from all sides. You also get the benefit of the meat absorbing some of that extra water, which adds to the juiciness factor.
The downside? Wet brines take up a lot of fridge space. Try fitting a 14-pound turkey submerged in two gallons of brine into a crowded refrigerator the day before Thanksgiving. It’s a real logistical headache. You also need to make sure the brine is fully cooled before the meat goes in — putting raw meat into warm liquid is a food safety problem you don’t want to deal with.
How a Dry Brine Works
A dry brine skips the water entirely. You rub salt (and any other seasonings you like) directly onto the surface of the meat, then let it sit uncovered in the fridge. The salt draws out the meat’s own moisture, dissolves into that liquid, and then gets reabsorbed back into the meat. It’s a self-brining process, which is kind of elegant when you think about it.
Dry brining gives you crispier skin on poultry because the surface dries out in the fridge. That’s a big win if you’re roasting a chicken or turkey and want that crackly, golden skin. It also takes up way less fridge space since there’s no bucket of liquid involved.
The trade-off is that dry brines don’t add extra moisture the way wet brines do. You’re working with the meat’s existing water content. For most cuts, that’s totally fine — the salt still does its job of helping the meat retain what it already has. But if you’re dealing with an extremely lean cut that’s prone to drying out, a wet brine gives you a bigger safety net.
Food science writer J. Kenji López-Alt has done extensive testing on dry brining and recommends it as the superior method for most poultry applications, largely because of the skin-crisping benefit and the simpler logistics. I tend to agree for everyday cooking. For a big holiday turkey where you want maximum insurance against dryness, I’ll still reach for a wet brine.
How to Brine Chicken (Step-by-Step)
Since chicken is the most common brining target, let’s walk through the whole process. This works for a whole bird, bone-in pieces, or even boneless breasts (with adjusted timing).
Start by making your brine. For a basic wet brine, combine 4 cups of cold water with 1/4 cup kosher salt and 2 tablespoons of sugar. Stir until everything dissolves. If you want to add aromatics — a smashed garlic clove, a few sprigs of thyme, some black peppercorns, a strip of lemon peel — go for it. These add subtle background flavor, though the salt is doing the real heavy lifting.
Place your chicken in a container just large enough to hold it and the brine. A large zip-top bag works great for smaller cuts because you can squeeze out the air and the brine surrounds the meat with less liquid. Pour the brine over the chicken, making sure it’s fully submerged.
Now for the timing. This is where people get tripped up because the answer depends on what cut you’re working with. Boneless chicken breasts only need 30 minutes to 2 hours. Bone-in thighs and drumsticks do well with 2 to 4 hours. A whole chicken benefits from 4 to 12 hours. Anything beyond 24 hours for chicken and you risk the texture turning mushy and overly salty. I learned this the hard way once when I forgot a batch of chicken thighs in the brine for nearly two days. The meat had a strange, almost spongy texture that no amount of seasoning could fix. Lesson learned — set a timer.
Important food safety note: Always brine in the refrigerator, never on the counter. Raw poultry sitting in liquid at room temperature is a breeding ground for bacteria. The USDA recommends keeping all perishable foods below 40°F, and that includes your brining meat. If you need a refresher on safe temperature ranges, our article on the food safety temperature danger zone covers the key numbers.
Disclaimer: The food safety information in this article is general guidance based on USDA recommendations. It is not a substitute for professional food safety training. When in doubt, follow current USDA guidelines at foodsafety.gov.
When the brining time is up, pull the chicken out and pat it dry thoroughly with paper towels. This step matters more than people think. Wet skin won’t crisp up in the oven, and wet surfaces steam instead of sear in a pan. If you’re dry brining, the drying happens automatically since the meat sits uncovered in the fridge.
You don’t need to rinse the chicken after brining unless you used a very salty brine or brined for the longer end of the time range. Rinsing washes away surface seasoning and re-wets the skin, which defeats the purpose of patting it dry. Just pat, season lightly (go easy on any additional salt), and cook.
How to Brine Other Meats
Chicken isn’t the only protein that benefits from a brine. The approach shifts a bit depending on the meat.
Turkey is the poster child for brining, and for good reason. A whole turkey is large, lean in the breast, and notoriously easy to overcook. A wet brine for 12 to 24 hours is the standard approach. Use about 1 cup of kosher salt per gallon of water for a bird in the 12 to 16 pound range. If fridge space is tight, a dry brine rubbed under and over the skin 24 to 48 hours before roasting works beautifully and frees up shelf space for all those side dishes.
Pork chops are another brining success story, especially the lean, boneless ones that dry out if you look at them wrong. A quick 2 to 4 hour wet brine using the same basic ratio as chicken makes a noticeable difference. For thicker, bone-in chops, you can push it to 6 hours. Pork tenderloin also responds well to a 4 to 6 hour brine.
Shrimp brines fast because the meat is so small and delicate. A 15 to 30 minute soak in a light brine (2 tablespoons kosher salt per quart of water) is plenty. Any longer and the texture turns rubbery. This is especially worth doing if you’re grilling shrimp, since the high heat dries them out quickly.
One category to skip: meats that are already brined or injected. Most supermarket “enhanced” pork and many pre-packaged turkeys have already been pumped with a salt solution. Check the label — if you see language like “contains up to 15% of a solution,” that meat is already brined. Brining it again will make it unpleasantly salty.
Brining Mistakes That Ruin Your Meat
Even though brining is simple, a few common mistakes can take your meat from juicy to inedible.
The biggest one is over-brining. Leaving meat in a brine too long doesn’t make it juicier — it makes it mushy and oversalted. The proteins can only hold so much water before they start to break down in a way that ruins the texture. Stick to the timing guidelines above and set a timer on your phone so you don’t forget.
Using table salt in the same volume as kosher salt is another frequent error. Table salt grains are tiny and pack densely, so a quarter cup of table salt has roughly twice the salinity of a quarter cup of Diamond Crystal kosher salt. If table salt is all you have, use half the amount. Morton’s kosher salt falls somewhere in between — it’s denser than Diamond Crystal but lighter than table salt.
Skipping the cooling step is a safety issue. If you heat your brine to dissolve the salt and sugar (which is fine and often helpful), you must cool it completely before adding raw meat. Placing chicken into a warm brine raises the meat’s surface temperature into the danger zone where bacteria multiply rapidly. Cool the brine in the fridge or speed things up by using ice cubes in place of some of the water.
Forgetting to adjust your seasoning after brining is a smaller but real mistake. Brined meat already has salt throughout, so you don’t need to salt it heavily before cooking. A light sprinkle or a salt-free rub is usually enough. If you’re using a pre-made seasoning blend, check whether salt is the first ingredient and dial it back accordingly.
Frequently Asked Questions About Brining
Do I need to rinse meat after brining?
Generally, no. Rinsing washes off surface seasoning and adds moisture back to the skin, which works against you if you want crispy results. Just pat the meat dry with paper towels and cook. The exception is if you accidentally over-brined or used a very concentrated brine — in that case, a quick rinse can help pull back some of the excess surface salt.
Can I brine meat that’s already been frozen?
Yes, and it actually works out well. You can place frozen meat directly into a cold brine in the refrigerator. The brine will help thaw the meat while it seasons it, which is a nice two-for-one. Just make sure the brine stays cold and factor in the extra thawing time. A frozen chicken breast might need an extra hour or two compared to a fresh one.
Is brining the same as marinating?
Not quite. A marinade typically relies on acid (vinegar, citrus, yogurt) to tenderize the surface of the meat and add flavor. A brine relies on salt to change the protein structure and improve moisture retention throughout the entire piece of meat. They serve different purposes, and you can actually use both — brine first for moisture, then marinate briefly for flavor. Our breakdown of marinade vs rub explains how these techniques compare in more detail.
Your Next Brine Starts Here
Brining isn’t a complicated technique that requires special equipment or culinary training. It’s salt, water, and a little patience. The payoff is meat that stays juicy even when you accidentally leave it in the oven five minutes too long — and honestly, that margin of forgiveness is worth the effort alone.
Start with something simple. Brine a pack of chicken breasts for an hour tonight, cook them the way you normally would, and pay attention to the difference. Once you taste what brining does, you’ll probably start working it into your routine for everything from pork chops to holiday turkey.
And when you’re ready to nail the final step, understanding what happens during carryover cooking after you pull the meat off the heat will help you hit the perfect temperature every single time.