
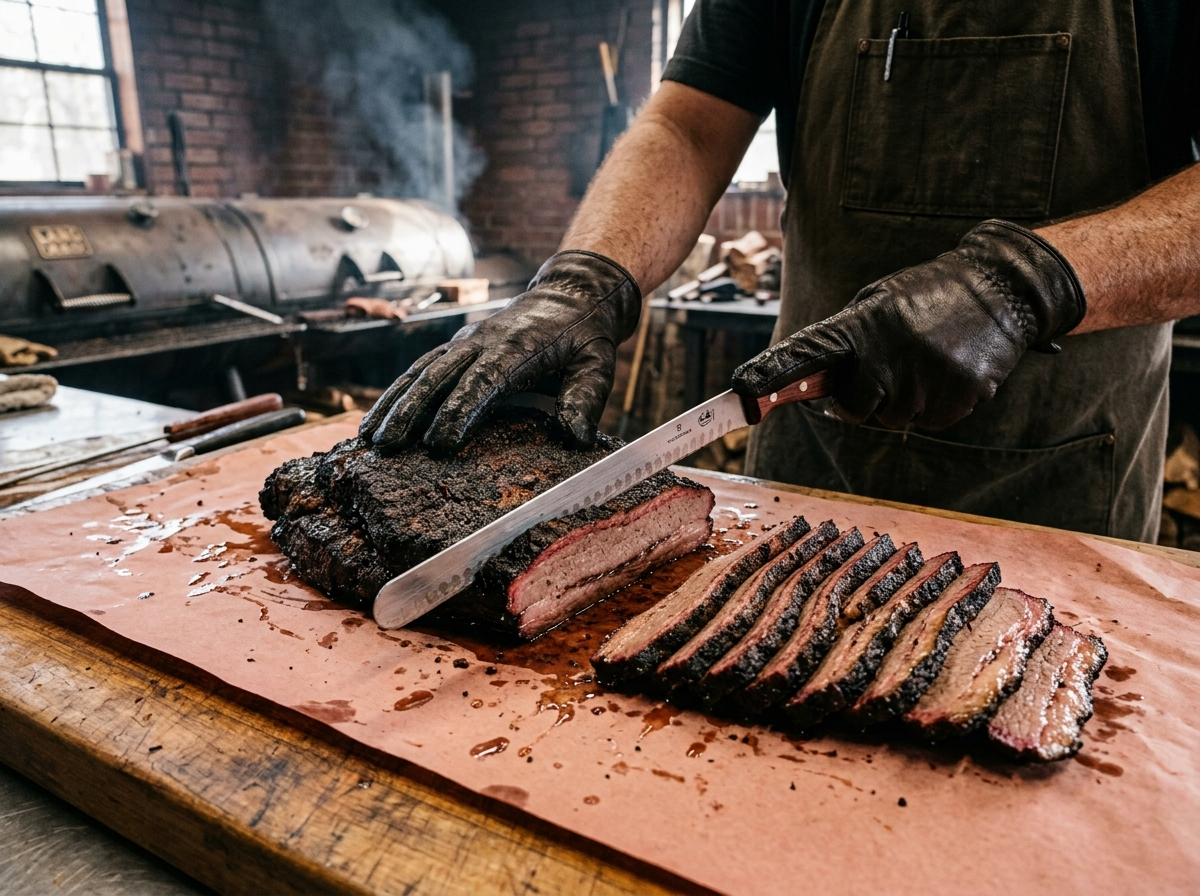
You spent 12 hours babysitting a smoker, spritzing, wrapping, and praying the stall would end. The brisket finally hit 203°F. You pull it off, and it looks gorgeous. Then you grab a knife, make your first cut, and the slices come out chewy and stringy. What happened?
Most of the time, the problem isn’t your cook. It’s your slice.
Slicing brisket correctly is the single biggest thing you can do to turn a good cook into a great one. A perfectly smoked brisket sliced the wrong way will taste tougher than a cheap steak. But a slightly overcooked brisket sliced against the grain can still melt in your mouth. That’s how much this step matters.
This brisket slicing guide will walk you through everything — from reading the grain to separating the flat from the point to choosing the right knife. Grab a cup of chai, and let’s get into it.
Why Slicing Brisket Correctly Matters More Than You Think
Brisket is a weird cut of meat. It comes from the chest of the cow, right below the shoulder. That area does a lot of heavy lifting — literally supporting the animal’s weight all day. Because of that, the muscle fibers in a brisket are long, thick, and bundled tightly together.
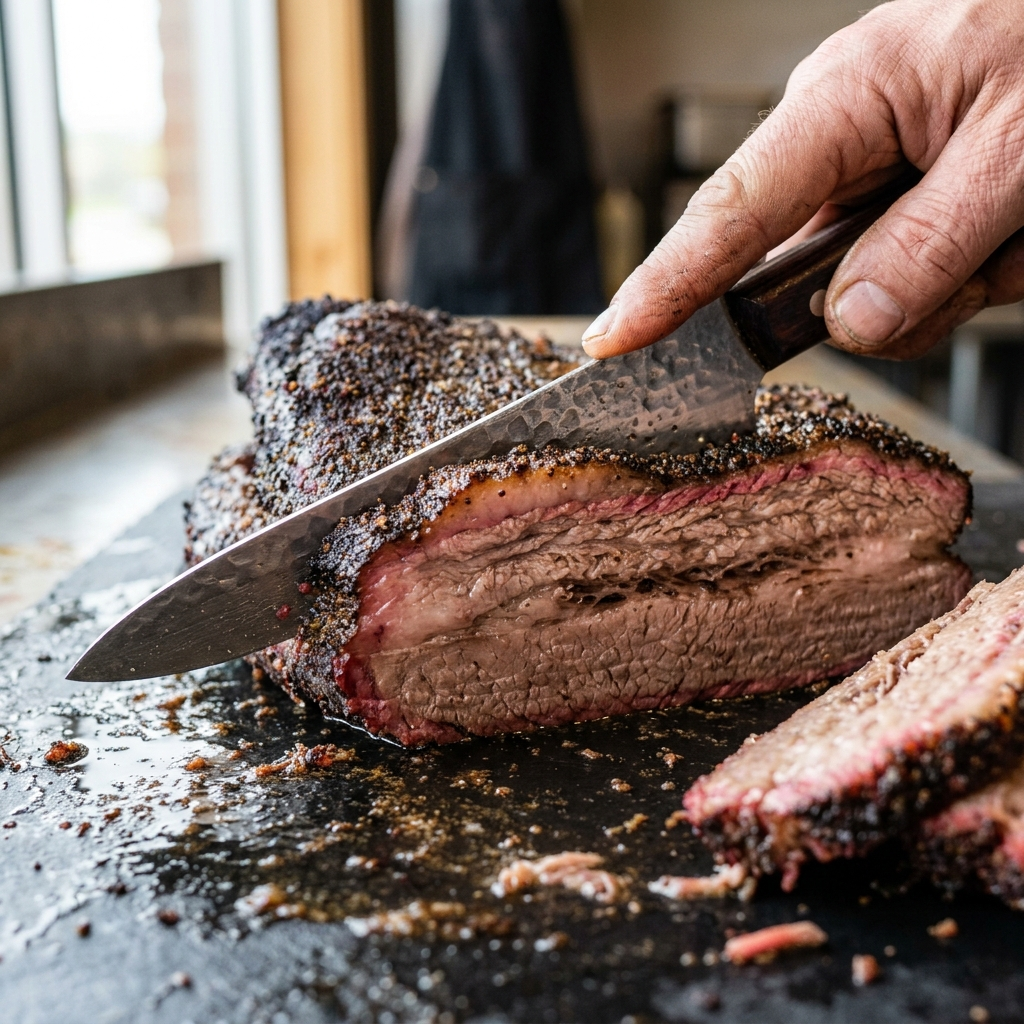
When you smoke a brisket low and slow, the heat slowly breaks down the collagen in those tough fibers into gelatin. That’s what gives you that silky, pull-apart texture. (If you want the deeper science on this, check out how heat affects muscle fibers in meat.) But here’s the catch: even after all that collagen breakdown, those long fibers are still there. They’re softer, sure, but they’re still long strands running in one direction.
When you bite into a slice of brisket, your teeth have to cut through those fibers. If you sliced with the grain — meaning parallel to the fibers — each bite contains long, intact strands. Your teeth have to do all the work, and the meat feels chewy and stringy no matter how perfectly you cooked it.
When you slice against the grain — perpendicular to those fibers — you’ve already done the work with your knife. Each bite contains short fiber segments that practically fall apart on your tongue. That’s the difference between “this is okay” and “this is the best brisket I’ve ever had.”
I learned this the hard way at a backyard cookoff a few years back. My brisket probe-tender, beautiful bark, perfect smoke ring. I sliced it quickly without paying attention to grain direction because I was rushing to feed people. The texture was rubbery. Meanwhile, a friend who’d cooked a slightly drier brisket but sliced it carefully against the grain got all the compliments. That stung, but it taught me a lesson I never forgot.
Understanding Brisket Anatomy: Flat, Point, and Grain
Before you pick up a knife, you need to understand what you’re looking at. A whole packer brisket has two distinct muscles stacked on top of each other, and they don’t behave the same way.
The Flat (First Cut)
The flat is the leaner, more uniform muscle. It’s the big rectangular slab that makes up most of the brisket. The grain in the flat runs in one fairly consistent direction — usually lengthwise along the cut. This is the easier section to slice because the grain is predictable.
The flat is also the section most people overcook because it’s thinner and has less fat to protect it. When you slice the flat, you want clean, even pieces about the width of a pencil. These are the slices you’ll fan out on a platter for presentation.
The Point (Second Cut / Deckle)
The point sits on top of the flat, separated by a thick layer of fat called the deckle. It’s thicker, fattier, and more irregularly shaped. The grain in the point runs at a different angle than the flat — sometimes nearly 90 degrees off. This is where most home cooks get confused.
The point is also where you get burnt ends, those caramelized, fatty cubes that are basically BBQ candy. Because the point has more intramuscular fat, it’s more forgiving if you slightly overcook it, and the slices tend to be richer and juicier.
Where the Grain Shifts
Here’s the part that trips almost everyone up. The grain direction changes between the flat and the point, and it doesn’t always shift in an obvious way. On some briskets, the transition is gradual. On others, it’s almost a hard turn.
The easiest way to find the grain is to look at the raw side of the brisket before you cook it. The lines of muscle fiber are visible on the surface. Some pitmasters even take a quick photo of the grain direction before applying their rub, because once the bark builds up, those grain lines get harder to see. If you forgot to do that, don’t worry — you can still find the grain by looking closely at the surface texture of the cooked meat or by making a small test cut on the flat end.
The Rest Before the Cut
I know you’re excited. The brisket is off the smoker, your guests are hovering, and the smell is incredible. But slicing a brisket too soon is one of the fastest ways to dry it out.
When meat cooks, the muscle fibers contract and squeeze moisture toward the center. If you cut into it immediately, all that juice rushes out onto your cutting board. You’ve seen this happen — you slice a hot piece of meat and a puddle forms instantly. That puddle is flavor and moisture leaving your brisket forever.
Resting gives the fibers time to relax and reabsorb that moisture. For a whole packer brisket, you want a minimum rest of one hour, and two hours is even better if you can manage it. Wrap the brisket in butcher paper or foil, then wrap that in old towels and place it in a dry cooler. This method holds the temperature safely while giving the meat time to settle.
The science behind this is straightforward, and it connects directly to why resting meat matters for any large cut. During the rest, carryover cooking also finishes the job, bringing the internal temperature up a few more degrees and further softening the collagen.
Quick tip: If you’re resting for more than two hours, keep an eye on the internal temperature. You want it to stay above 140°F for food safety. The temperature danger zone is real, and brisket is no exception.
How to Slice Brisket Against the Grain: Step-by-Step
Alright, your brisket is rested, your knife is sharp, and your cutting board is ready. Here’s exactly how to break it down.
Step 1: Identify the Grain on the Flat
Lay the brisket on your cutting board with the flat end facing you. Look closely at the surface of the meat. You’ll see fine lines running in one direction — those are the muscle fibers. That’s your grain. You want to cut perpendicular to those lines, which means your knife should cross them at roughly a 90-degree angle.
If the bark is thick and you can’t see the grain, make a small test slice at the thin end of the flat. Pull the slice apart gently. If it shreds into long strings, you’re cutting with the grain. Rotate 90 degrees and try again. When the slice pulls apart cleanly with short fibers, you’ve found the right angle.
Step 2: Slice the Flat
Start at the thin end of the flat and work your way toward the thicker middle. Use long, smooth strokes — don’t saw back and forth. Let the knife do the work. Aim for slices about the thickness of a No. 2 pencil, roughly a quarter inch.
Some pitmasters go slightly thinner for competition-style presentation, and slightly thicker for backyard serving. Either way, consistency matters more than the exact measurement. You want every slice to be roughly the same thickness so they all have the same texture when someone bites in.
As you slice, you’ll notice the slices getting wider as you move into the thicker part of the flat. That’s normal. Keep your angle consistent and your strokes smooth.
Step 3: Separate the Flat from the Point
Once you’ve sliced through most of the flat, you’ll reach the area where the point muscle starts overlapping. You’ll know you’re there because the grain direction will start to look different, and you’ll see that thick layer of deckle fat between the two muscles.
At this point, stop slicing and use your knife to separate the flat from the point along that fat layer. It should come apart fairly easily — the fat acts like a natural seam. Set the flat slices aside and turn your attention to the point.
Step 4: Rotate and Slice the Point
This is the critical step most people skip. The grain in the point runs at a different angle than the flat, often nearly perpendicular. If you keep slicing in the same direction you used for the flat, you’ll be cutting with the grain on the point, and those slices will be tough.
Rotate the point about 60 to 90 degrees so you’re once again cutting across the grain. The exact angle depends on your specific brisket, so take a moment to read the grain lines on the point before you start. Make a test cut if you need to.
The point slices will be fattier and less uniform than the flat slices. That’s totally fine. These are the rich, decadent pieces that brisket lovers fight over. Some people prefer the point to the flat, and honestly, I’m one of them.
Step 5: Handle the Burnt End Area
The thickest, fattiest end of the point is where burnt ends come from. If you want to make burnt ends, cube this section into roughly one-inch pieces, toss them in a bit of sauce and rub, and throw them back on the smoker for another hour or so. If you’d rather just serve them as slices, cut them a bit thicker than the rest — about half an inch — to hold all that rendered fat together.
Choosing the Right Knife and Slice Thickness
Your knife matters more than you’d think for brisket slicing. You don’t need a fancy Japanese blade or a custom-made slicer, but you do need a few specific things.
A long slicing knife, somewhere between 10 and 14 inches, works best. The length lets you make full, single-stroke cuts across the wide flat without sawing back and forth. A granton-edge knife — the kind with those little dimples along the blade — helps prevent the meat from sticking to the flat of the blade, which gives you cleaner slices.
A sharp chef’s knife will work in a pinch, but the shorter blade means you’ll need multiple strokes for wider cuts, and that creates jagged edges on your slices. A serrated bread knife is a common mistake. It tears the meat fibers instead of cutting them cleanly, which ruins the texture you worked so hard to build during the cook.
As for slice thickness, the pencil-width rule is a good starting point, but adjust based on the cook. A very tender, well-rendered brisket can handle slightly thicker slices because the fibers are soft enough to break apart easily. A brisket that’s a touch underdone benefits from thinner slices, which shorten the fibers more aggressively and compensate for the firmer texture.
Aaron Franklin, the pitmaster behind Franklin Barbecue in Austin, has talked extensively about this in his brisket tutorials. He recommends the pencil-width standard and emphasizes a smooth, confident stroke rather than a hesitant sawing motion. You can find his full technique in his book Franklin Barbecue: A Meat-Smoking Manifesto and in his widely available YouTube series on brisket. (Verify specific video links before publishing.)
What to Do with the Trimmings and Odd Ends
After you’ve sliced the flat and the point, you’ll have some irregular pieces left over — the thin edges of the flat, the fatty cap trimmings, and the small end pieces that don’t make pretty slices. Don’t throw these away.
Chop them up finely and mix them with a little of the rendered fat and some of your finishing sauce. This makes incredible chopped brisket for tacos, sandwiches, or nachos. If you’re serving a crowd, the chopped brisket often disappears faster than the pretty slices because it’s so flavorful and easy to eat.
The fatty trimmings from the deckle can be rendered down for beef tallow, which is liquid gold for frying potatoes or basting your next cook. (If you’re curious about cooking with tallow, here’s a solid guide to beef tallow.)
Frequently Asked Questions
How do I find the grain on a brisket after it’s cooked?
Look for the fine lines running across the surface of the meat. On the flat, the grain usually runs lengthwise. On the point, it shifts to a different angle, often close to 90 degrees from the flat. If the bark is too dark to see the grain, make a small test cut at the edge and pull the slice apart. Long strings mean you’re cutting with the grain. Short, clean breaks mean you’re cutting against it.
Can I slice brisket with a regular kitchen knife?
You can, but it’s not ideal. A standard 8-inch chef’s knife is too short for clean, single-stroke cuts across the wide flat. You’ll end up sawing, which tears the fibers and creates ragged slices. A long slicing knife (10-14 inches) makes a noticeable difference. If a slicing knife isn’t in your budget yet, use your longest, sharpest knife and focus on smooth, confident strokes.
How thick should brisket slices be for competition vs. backyard?
Competition brisket slices are typically about a quarter inch thick — roughly pencil-width — because judges evaluate texture and bite. For backyard serving, you have more flexibility. Thinner slices (about an eighth of an inch) work well for sandwiches. Thicker slices (up to half an inch) are great for the fatty point sections. The most important thing is that you’re cutting against the grain, regardless of thickness.
Why is my brisket tough even though I sliced against the grain?
If the grain direction is correct and the meat is still tough, the brisket likely didn’t cook long enough to fully render the collagen. The internal temperature is a guide, but tenderness is the real test. The brisket should feel like pushing a probe into warm butter. If it still has resistance, it needs more time. Slicing against the grain helps a lot, but it can’t fully compensate for an undercooked brisket.
Slicing a brisket well isn’t complicated, but it does require patience and attention. Take the time to read the grain, separate the flat from the point, and adjust your angle between the two muscles. Use a long, sharp knife and smooth strokes. And please, let the meat rest before you cut into it.
The next time you pull a brisket off the smoker, slow down at the cutting board. Those last five minutes of focus will make more difference to your final plate than almost anything else you did during the cook. Your guests won’t know why the brisket tastes so much better this time — but you will.
Now go slice something delicious. And if you’re planning your next cook, you might want to brush up on the basics of low and slow cooking to make sure the meat is ready for that perfect slice.



1 Comment