
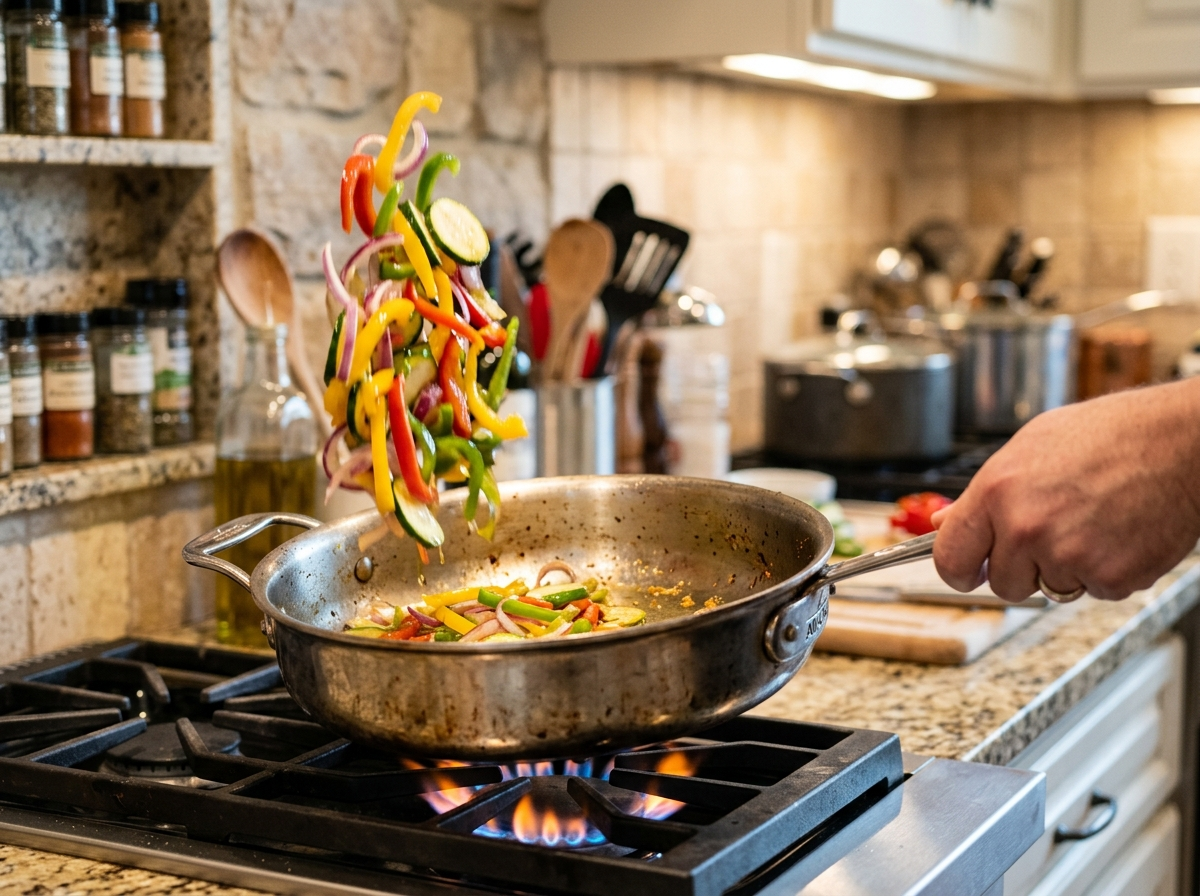
You chop your peppers, toss them in a pan with some oil, and wait. Five minutes later, you’ve got a sad, watery puddle of steamed vegetables instead of the golden, slightly charred pieces you were hoping for. Sound familiar?
You’re not doing anything wildly wrong. You’re just missing a few small details that make the difference between soggy and spectacular. Sautéing is one of the most useful techniques you can learn in the kitchen, and once you understand the “why” behind the heat, the pan, and the oil, you’ll use it almost every night.
What Is Sautéing, Really?
Sautéing is a dry-heat cooking method where you cook food quickly in a small amount of fat over relatively high heat while keeping it moving. The word comes from the French sauter, which means “to jump.” That’s exactly what the food should be doing — jumping and tossing in the pan.
That definition matters because it separates sautéing from what most home cooks actually do, which is closer to shallow frying or steaming. True sautéing relies on direct contact between the food and the hot surface of the pan. The thin layer of oil acts as a heat conductor, not a bath. You want browning, not boiling.
The browning you’re after comes from the Maillard reaction, a chemical process that kicks in around 280°F to 330°F when amino acids and sugars on the surface of your food react with heat. Harold McGee explains this beautifully in On Food and Cooking — it’s the same reaction that gives you a golden crust on bread, a seared steak, and those gorgeous brown bits at the bottom of the pan. Those brown bits, by the way, are called fond, and they’re pure flavor. You’ll want them later when you deglaze.
So the goal is simple: hot pan, thin layer of fat, dry food surface, and constant movement. Get those four things right, and you’ll sauté like someone who went to culinary school.
The Right Pan and the Right Oil
Your pan and your oil are the two biggest variables you control, and getting them wrong is the fastest way to end up with stuck-on, unevenly cooked food.
Sauté Pan vs. Skillet — Does It Matter?
A sauté pan has straight, vertical sides and a wide, flat bottom. A skillet (or frying pan) has sloped, flared sides. Both work for sautéing, but they do slightly different jobs.
The straight sides of a sauté pan give you more surface area on the bottom and keep food from flying out when you toss it. They also hold more volume, which is great if you’re cooking for a family. The sloped sides of a skillet make it easier to slide a spatula under delicate foods like fish fillets or to flip things with a flick of the wrist.
For most home cooks, a 10- to 12-inch skillet with a heavy bottom is the most versatile choice. Stainless steel or carbon steel gives you the best browning because those materials hold and distribute heat evenly. Non-stick works fine for delicate items like eggs or flaky fish, but it won’t give you the same fond or crust. If you want that deep, caramelized color on your chicken or mushrooms, reach for the stainless steel.
Choosing Your Oil Based on Smoke Point
Your oil needs to handle the heat without breaking down. Every fat has a smoke point — the temperature at which it starts to smoke, break apart, and taste bitter. Sautéing typically happens between 350°F and 400°F, so you need an oil that can hang out in that range without throwing a fit.
Good choices include avocado oil (smoke point around 520°F), refined olive oil (around 465°F), and peanut oil (around 450°F). Extra virgin olive oil sits lower, around 325°F to 375°F, which means it can work for gentle sautéing of onions or garlic but will smoke and turn acrid if you crank the heat for a hard sear. If you want a deeper look at how fats behave in cooking, this breakdown of acid and fat as the yin and yang of cooking is worth a read.
A quick note on butter: it tastes incredible, but the milk solids in butter burn around 300°F. If you want that buttery flavor, start with a high-smoke-point oil and finish with a knob of butter at the end. You get the best of both worlds without the burnt, bitter taste.
How to Sauté: Step-by-Step Technique
Here’s where the rubber meets the road. Follow these steps and you’ll see an immediate improvement in everything you cook on the stovetop.
Step 1: Dry your food. This is the step most people skip, and it’s the single biggest reason sautéed food turns out soggy. Water is the enemy of browning. When wet food hits a hot pan, the water has to evaporate before the surface can get hot enough for the Maillard reaction to start. That means your food steams instead of sears. Pat your chicken, shrimp, tofu, or vegetables dry with a paper towel before they go anywhere near the pan.
Step 2: Heat the pan first, then add the oil. Place your empty pan on the burner over medium-high heat and let it get hot for about 60 to 90 seconds. Then add your oil and swirl it around. You’ll know the oil is ready when it shimmers and moves like water across the surface, not like thick syrup. If it starts smoking, you’ve gone too far — pull the pan off the heat for a moment and let it cool slightly.
Step 3: Add the food and listen. When your food hits the pan, you should hear an immediate, aggressive sizzle. No sizzle means your pan isn’t hot enough. Take the food out, wait another minute, and try again. That sizzle tells you the surface is hot enough to start browning.
Step 4: Don’t touch it right away. This sounds like it contradicts the “keep it moving” rule, but hear me out. Let the food sit undisturbed for 30 to 60 seconds so it can develop contact with the hot surface and start to brown. Then toss, stir, or flip. Constant stirring from the very first second prevents browning because the food never stays in contact with the pan long enough.
Step 5: Keep things moving after the initial sear. Once you’ve got some color, start tossing or stirring more frequently to cook everything evenly. The whole process should be fast — sautéing is a high-heat, quick-cooking method. Most vegetables take 3 to 7 minutes. Thin cuts of chicken or shrimp take 4 to 6 minutes.
The Overcrowding Mistake Everyone Makes
I can’t stress this enough: do not pile your pan full of food. When you overcrowd the pan, the temperature of the cooking surface drops dramatically. All that moisture trapped between the pieces creates a steam cloud, and suddenly you’re braising instead of sautéing.
Here’s what actually happens when you dump a full bag of sliced mushrooms into a 10-inch skillet. The mushrooms release their water, the pan temperature plummets, and the liquid pools at the bottom. Instead of golden-brown, meaty mushrooms, you get gray, rubbery ones swimming in their own juice. I’ve done this more times than I’d like to admit.
The fix is simple. Cook in batches if you need to. Give each piece of food some personal space on the pan surface. You should be able to see the bottom of the pan between the pieces. It takes a few extra minutes, but the difference in texture and flavor is night and day.
Sautéing Different Foods — What Changes?
The basic technique stays the same, but the details shift depending on what you’re cooking.
Vegetables
Hard, dense vegetables like carrots, broccoli, and potatoes take longer and benefit from being cut into small, uniform pieces so they cook evenly. Start them in the pan first and give them a head start before adding softer vegetables like bell peppers or zucchini. A splash of water or broth near the end can help tenderize the harder pieces without losing that sautéed texture. If you’re curious about how other high-heat methods compare for vegetables, this piece on whether you can BBQ vegetables or fruit has some good perspective.
Leafy greens like spinach and kale are a different story. They wilt in seconds. Add them at the very end of your sauté, toss them for 30 to 60 seconds, and pull them off the heat. They’ll continue to soften from residual warmth.
Proteins
Chicken breast, shrimp, pork tenderloin medallions, and firm fish fillets all sauté beautifully. The key is uniform thickness. If your chicken breast is thick on one end and thin on the other, the thin end will dry out before the thick end is safe to eat. Pound it to an even thickness or slice it into cutlets.
For proteins, you want a slightly higher heat and a bit more patience with the initial sear. Let the chicken sit for a full 2 to 3 minutes on the first side before flipping. That’s how you build a golden crust. If you’re working with thicker cuts or want to understand the broader principles of high-heat protein cookery, this guide to hot and fast meat cooking basics fills in a lot of the gaps.
Food Safety Note: Always cook poultry to an internal temperature of 165°F and ground meats to 160°F as recommended by the USDA (foodsafety.gov). Use an instant-read thermometer to check — guessing by color is unreliable. This is general food safety information and not a substitute for guidance from a food safety professional. For a deeper look at the temperature ranges to watch out for, check out this overview of the food safety temperature danger zone.
Aromatics
Garlic, ginger, shallots, and onions are the backbone of flavor in most sautéed dishes, but they burn fast. Garlic goes from fragrant to bitter in about 30 seconds over high heat. The trick is to add aromatics after your main ingredients have already started cooking, or to start them over medium heat in the oil before turning the heat up.
Onions are more forgiving and actually benefit from a longer, slower sauté if you want them sweet and caramelized. But if you’re just softening them as a base for a quick weeknight stir-fry, 2 to 3 minutes over medium-high heat is plenty.
Sauté Pan Tips That Actually Make a Difference
A few practical things I wish someone had told me years ago.
Prep everything before you turn on the heat. Sautéing moves fast. If you’re chopping garlic while your chicken is already in the pan, something is going to burn. This is what the French call mise en place — everything in its place. Chop, measure, and arrange your ingredients in small bowls before the pan gets hot.
Season in layers. Salt your food before it goes into the pan, not just at the end. Salt draws out a small amount of moisture from the surface, which sounds counterintuitive after I told you to keep things dry, but the effect is minimal and the flavor payoff is huge. The salt penetrates the food as it cooks instead of just sitting on top. If you want to dig deeper into seasoning strategy, this guide to feeling salty and the art of seasoning breaks it down well.
Don’t throw away the fond. Those brown bits stuck to the bottom of the pan after sautéing are loaded with umami flavor and depth. After you remove your food, pour in a splash of wine, broth, or even water and scrape the bottom of the pan with a wooden spoon. That’s deglazing, and it turns a good sauté into a great pan sauce in about 60 seconds.
Match your burner to your pan size. A small pan on a huge burner wastes heat and can warp the metal. A large pan on a tiny burner creates hot and cold spots that cook your food unevenly. The flame or heating element should roughly match the diameter of the pan’s bottom.
Frequently Asked Questions
What temperature should I sauté at?
Most sautéing happens over medium-high heat, which on a typical home stove translates to a pan surface temperature of roughly 350°F to 400°F. You don’t need a thermometer for this — the shimmer test on your oil and the sizzle test when food hits the pan are reliable indicators. The exact setting on your dial will vary depending on your stove, so learn what “medium-high” looks like on yours.
What’s the difference between sautéing and stir-frying?
Stir-frying uses even higher heat (often a wok over a roaring flame), very little oil, and almost constant, rapid stirring. Sautéing uses moderate-high heat, a flat-bottomed pan, and a combination of brief resting and tossing. Stir-frying is faster and works best with small, uniform pieces. Sautéing is more forgiving and better suited to larger cuts of protein and heartier vegetables.
Can I sauté in a non-stick pan?
Yes, but with limits. Non-stick pans are great for delicate foods like eggs, fish, and pancakes. They’re not ideal for building fond or getting a deep sear because the coating prevents the browning reactions that happen best on bare metal. If your goal is a golden crust on chicken or caramelized vegetables, use stainless steel or carbon steel. If you just need to soften some onions without sticking, non-stick works fine.
The next time you stand in front of the stove, take an extra 30 seconds to pat your food dry, let the pan heat up properly, and resist the urge to overcrowd. Those small shifts will change the way your food looks, tastes, and feels. Sautéing isn’t a fancy restaurant trick — it’s a weeknight workhorse that rewards a little attention with a lot of flavor.
Grab a skillet, heat it up, and try sautéing a simple batch of mushrooms or chicken thighs tonight. You’ll taste the difference immediately.

1 Comment