Eight out of ten backyard grillers say burgers are the first thing they ever cooked on a grill — and most of them will also admit their early attempts were either charred hockey pucks or raw in the middle. Sound familiar? Grilling burgers on a gas grill should be one of the simplest things you do in your kitchen (well, your backyard). And honestly, it is — once you understand a few basics that most people skip over. This guide walks you through the whole process, from choosing the right meat to pulling perfectly cooked burgers off the grate. No guesswork, no stress, and definitely no dry patties.
Why Gas Grills Work Great for Burgers
There’s a long-standing debate between gas and charcoal, and you’ll hear charcoal loyalists swear their burgers taste better. But here’s the thing — for burgers specifically, gas grills offer some real advantages that don’t get enough credit.
You get precise temperature control with a gas grill. You can dial in a specific heat level and keep it there. That matters a lot with burgers because they cook fast, and even a 50°F temperature swing can mean the difference between juicy and dried out. With charcoal, you’re constantly managing hot spots and fading heat. With gas, you set your burners and focus on cooking.
Gas grills also heat up in about 10–15 minutes, which means you can go from “I’m hungry” to “burgers are on” pretty quickly. And cleanup? Way easier. No ash, no leftover charcoal chunks.
Does charcoal add a slightly smokier flavor? Sure. But a well-seasoned gas grill with proper technique produces burgers that’ll make your neighbors jealous. The flavor in a great burger comes mostly from the meat, the seasoning, and the Maillard reaction (that gorgeous brown crust) — and your gas grill handles all of that beautifully.
Picking the Right Ground Beef
Your burger is only as good as the meat you start with. This is where a lot of people make their first mistake — grabbing whatever ground beef is cheapest or leanest.
The ideal fat ratio is 80/20. That means 80% lean meat and 20% fat. The fat is what keeps your burger moist and gives it that rich, beefy flavor. If you go leaner — say 90/10 or 93/7 — you’re almost guaranteed a drier burger unless you really baby it on the grill.
Think of it this way: that fat melts during cooking and essentially bastes the burger from the inside out. Without enough fat, the heat just tightens the protein fibers and squeezes out moisture.
If you can, buy ground chuck specifically. Chuck comes from the shoulder area of the cow and has a naturally great balance of flavor and fat. Ground round or ground sirloin sound fancier, but they’re leaner and tend to produce tougher burgers.
Pro Tip: If you have a butcher nearby, ask them to grind the meat fresh. Pre-packaged ground beef has been handled and compressed more, which can make your patties denser. Freshly ground beef makes a noticeable difference in texture.
If you’re exploring different types of meat for taco fillings or burgers, you already know that the cut and fat content completely change the final result. The same principle applies here.
Shaping Your Patties the Right Way
Here’s where technique really starts to matter. You can have the best ground beef in the world, but if you shape your patties wrong, you’ll end up with problems on the grill.
Don’t overwork the meat. This is probably the number one mistake home cooks make. When you knead, squeeze, and press ground beef too much, you activate the proteins (myosin, specifically), and the meat starts binding together tightly — almost like a meatloaf texture. You want a burger, not a meat brick.
Gently divide your ground beef into portions. For a standard burger, aim for about 6 to 8 ounces per patty. Take each portion and lightly form it into a ball, then press it down into a disc that’s about ¾ inch thick and slightly wider than your bun. Why wider? Because burgers shrink as they cook. A patty that starts the same size as your bun will end up noticeably smaller by the time it’s done.
Now, here’s the trick that separates good burgers from great ones: press a shallow thumbprint dimple into the center of each patty. Use your thumb or the back of a spoon and make a gentle indentation about ¼ inch deep. This prevents the dreaded “burger ball” — that puffy, rounded shape that happens because the edges of the patty cook faster than the center, causing the middle to push upward. The dimple counteracts that pressure and keeps your patty flat and even.
Seasoning: Keep It Simple but Time It Right
You don’t need a complicated spice blend for a great grilled burger. In fact, overcomplicating the seasoning is one of the fastest ways to muddy the flavor of good beef.
Salt and freshly ground black pepper. That’s really all you need. But — and this is important — use more than you think you should. A burger patty is thick, and seasoning only hits the outside surface. A light sprinkle won’t cut it. Be generous.
The timing question comes up a lot: should you season the meat before or after forming the patties? There are two schools of thought, and both have merit. Salting the meat before shaping can draw out moisture and make the texture slightly more sausage-like if you let it sit too long. Salting the formed patties right before grilling keeps the texture looser and more “burgery.”
My recommendation? Season the outside of your formed patties about 15–20 minutes before they hit the grill. This gives the salt a little time to start working its way into the surface, but not so long that it fundamentally changes the texture.
If you love garlic powder, onion powder, smoked paprika, or a little cayenne, feel free to add them. Just remember that with burgers, less is usually more. You’re not trying to mask the beef flavor — you’re trying to support it.
Did You Know? Worcestershire sauce mixed into the ground beef is a classic diner trick. A tablespoon per pound of meat adds umami depth without changing the burger’s character. If you use it, mix it gently before forming your patties.
Setting Up Your Gas Grill for Burgers
Don’t just crank every burner to high and toss the patties on. A little grill setup goes a long way toward better results.
Preheat your grill for 10–15 minutes with the lid closed. You want those grates hot. When patties hit a properly preheated grate, they sear immediately, which builds flavor and prevents sticking. If you skip preheating, the meat will stick to cold grates and tear apart when you try to flip.
Now, here’s something most burger recipes don’t explain well: two-zone grilling. Set up your gas grill with one side on medium-high heat (around 375–450°F) and the other side on low or even off. The hot side is your searing zone — this is where you’ll cook the burgers for most of the time. The cooler side is your safety zone. If you get flare-ups, if a patty needs more time to cook through without burning the outside, or if some burgers are done before others, you move them to the cooler side.
This setup gives you control. And control is what separates a good grilling session from a stressful one.
Should you oil the grates? Yes, but carefully. Dip a folded paper towel in a high-smoke-point oil (canola or vegetable oil work fine), grab it with long tongs, and wipe the hot grates. Don’t spray oil directly on a lit grill — you’ll get a fireball.
Understanding your grill temperature is half the battle here. If you want a deeper look at temperature ranges and what they mean for your burger, check out this burger temperature guide covering all doneness levels.
Grilling Your Burgers: The Step-by-Step Process
Alright, your grill is hot, your patties are seasoned, and you’re ready to cook. Here’s exactly how to do it.
Getting the Patties on the Grill
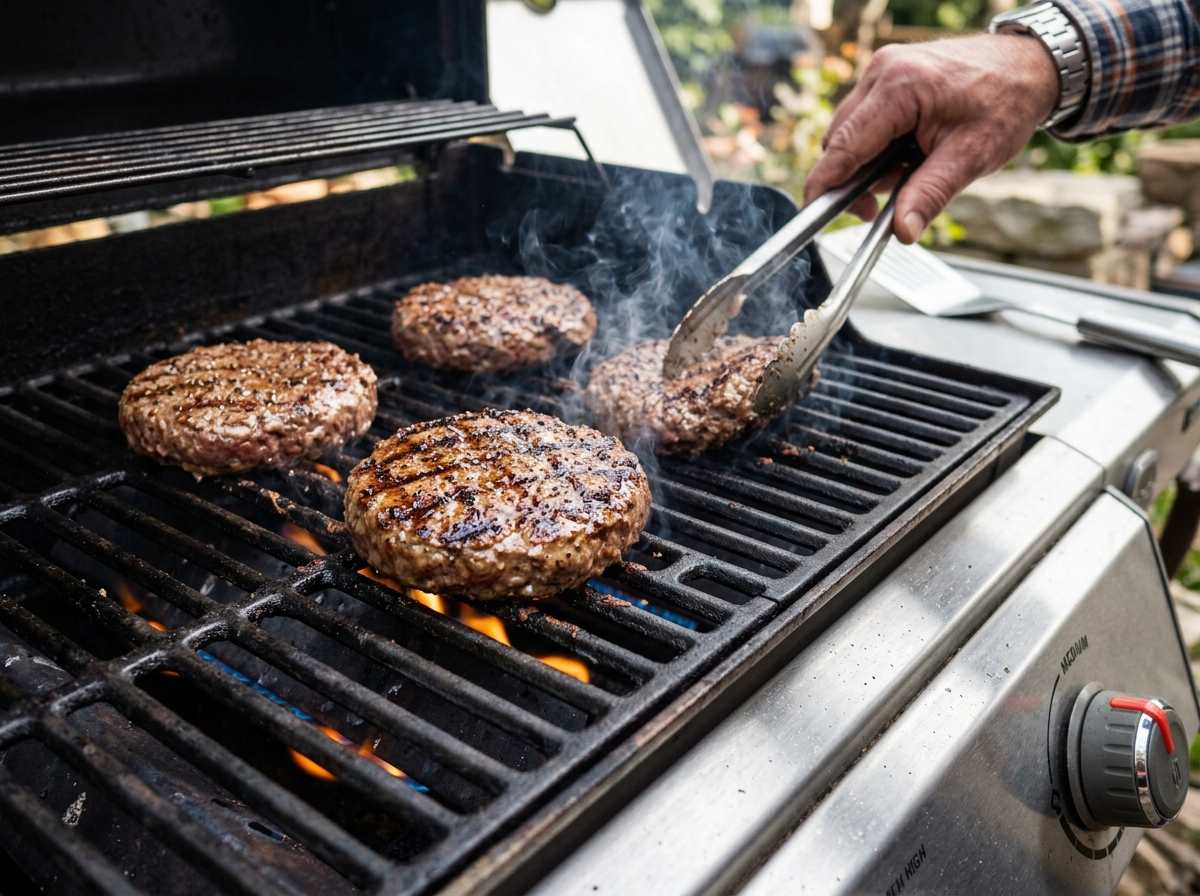
Place your patties on the hot side of the grill, dimple-side up. Give each patty a few inches of space — don’t crowd them. Crowded patties steam instead of searing, and you won’t get that crusty exterior you’re after.
Once they’re on the grate, close the lid. This is a gas grill, and closing the lid creates an oven-like environment where heat circulates around the burger from all sides. It cooks more evenly this way.
How Long to Cook Each Side
For a ¾-inch thick patty at medium-high heat (around 400°F), here’s a general timing guide:
Rare (internal temp 120–125°F): About 2–3 minutes per side. The center will be very red and cool. Not recommended by the USDA for ground beef, but some people prefer it.
Medium-Rare (130–135°F): About 3–4 minutes per side. Warm red center with plenty of juice.
Medium (140–145°F): About 4–5 minutes per side. Pink center, slightly firmer. This is the sweet spot for most people.
Medium-Well (150–155°F): About 5–6 minutes per side. Slight hint of pink. Still has some juice if you didn’t press the patty.
Well-Done (160°F+): About 6–7 minutes per side. No pink, fully cooked through. The USDA recommends ground beef reach 160°F for food safety.
These times are approximate. Your grill’s actual temperature, the thickness of your patties, the outdoor temperature, and even wind can affect cooking time. That’s why a meat thermometer is your best friend. More on that in a minute.
For an even more detailed timing breakdown, take a look at this guide on how long to grill burgers at 400°F — it really dials in the specifics.
When to Flip (and How Many Times)
Flip once. That’s it. Let the first side cook undisturbed until you see juices starting to pool on the top surface of the patty. That’s your signal — the bottom is seared and ready.
Use a thin, wide spatula and flip in one confident motion. Don’t use a fork (you’ll puncture the patty and lose juices), and don’t flip timidly (the patty might break). Slide the spatula fully under the burger and turn it over.
Some grilling forums will tell you to flip every minute for more even cooking. For thin smash burgers, there’s some truth to that. For standard ¾-inch patties on a gas grill, one flip works perfectly. You get a better crust, and you’re not fussing over the grill constantly.
The Golden Rule: Don’t Press Your Burgers
You’ve seen it happen at every backyard cookout. Someone grabs a spatula and pushes down hard on the burger, and a dramatic sizzle of fat and juice hits the flames. It looks cool. It sounds cool. And it absolutely destroys your burger.
When you press a burger on the grill, you’re squeezing out the fat and moisture that keep it juicy. All that sizzling? That’s flavor literally dripping away and being lost forever.
The only exception is if you’re intentionally making smash burgers — which is a specific technique using thin patties pressed flat against a flat-top or griddle at the very start of cooking. That’s a different method entirely. For standard grilled burgers, keep your spatula to yourself once the patty is on the grate.
Nailing the Perfect Internal Temperature
Guessing doneness by poking the burger, pressing on it with your finger, or cutting it open are all unreliable methods. The finger-press test (comparing firmness to parts of your palm) sort of works if you’ve cooked thousands of burgers, but for everyone else, it’s just a guessing game.
An instant-read meat thermometer takes five seconds to use and removes all the guesswork. Insert it through the side of the patty so the probe reaches the center. That’s your accurate reading.
The USDA recommends cooking ground beef to 160°F for food safety because grinding beef can introduce bacteria throughout the meat (unlike a whole steak, where bacteria mostly sits on the surface). If you’re cooking for kids, elderly family members, pregnant guests, or anyone with a compromised immune system, hitting 160°F is the right call.
If you want more detail on safe temperatures and the reasoning behind them, this hamburger internal temp chart breaks it all down clearly.
Warning: Color alone isn’t reliable. A burger can look brown and cooked at 145°F, or it can still look slightly pink at 160°F depending on the meat. pH levels, how the meat was stored, and even certain seasonings can affect color. Trust the thermometer, not your eyes.
Adding Cheese at the Right Moment
If you’re making cheeseburgers — and let’s be honest, you probably are — timing matters.
Add your cheese during the last 1–2 minutes of cooking. Close the lid immediately after placing the cheese on the patties. The trapped heat melts the cheese evenly without you having to wait forever or risk overcooking the burger.
What cheese should you use? That’s personal preference, but here’s a quick breakdown of how popular options behave on the grill:
American cheese melts the fastest and most evenly. There’s a reason it’s the classic diner cheeseburger choice — it practically melts on contact.
Cheddar takes a little longer and doesn’t flow as smoothly, but adds sharper flavor. Sharp cheddar works better than mild for standing up to the beefy taste.
Pepper Jack is great if you want a little heat. Melts well and adds both spice and creaminess.
Swiss melts beautifully but has a milder, nuttier flavor. Works well with mushroom and caramelized onion toppings.
Pro Tip: If you want faster, more even melting, place a small metal dome or even a disposable aluminum pan over the patties after adding cheese. This creates a mini steam chamber and gets the cheese perfectly melty in about 30–45 seconds.
Don’t Skip the Bun (Toasting Makes a Difference)
A soggy bun can ruin an otherwise perfect burger. And the fix takes about 60 seconds.
During the last minute of cooking, place your burger buns cut-side down on the cooler zone of your grill. Watch them closely — they go from toasted to burned fast. You want them lightly golden with a bit of crunch, not charred.
Toasting does two things: it adds texture contrast (crispy bun + juicy burger = perfect bite), and it creates a slight barrier that prevents burger juices from immediately soaking through and making the bun fall apart.
Some people butter the cut side of the buns before toasting. That’s not required, but it does add richness and helps achieve a more even golden color. If you’ve got the time, it’s worth doing.
For bun selection, brioche buns are the current popular choice — they’re soft, slightly sweet, and hold up well under a juicy burger. Classic sesame seed buns work great too. Pretzel buns add a nice chew. Just avoid anything too thick or too crusty — you want the bun to complement the burger, not fight it.
Resting Your Burgers (Yes, Really)
This step gets skipped at almost every cookout, and it shouldn’t.
When you pull burgers off the grill, the juices inside are hot and actively moving around. If you bite into the burger immediately, those juices run out onto your plate (or down your arm). If you let the burger rest for 3–5 minutes, the juices redistribute and settle back into the meat. Your first bite will be noticeably juicier.
You don’t need to tent burgers with foil like you would a steak — they’re thin enough that they won’t lose much heat in 3–5 minutes. Just set them on a clean plate or cutting board and resist the temptation to dig in immediately.
This is the same principle that applies to any grilled meat. If you’re curious about timing and temperatures for other grilled items like turkey burgers, resting applies there too.
Troubleshooting Common Gas Grill Burger Problems
Even with great technique, things can go sideways. Here’s how to handle the most common issues.
Burgers Sticking to the Grates
Your grill wasn’t hot enough, or the grates weren’t oiled. If a patty is stuck, don’t force it — give it another 30 seconds. A properly seared burger will release from the grate naturally. If you yank it too early, you’ll tear the crust off and leave it stuck to the grate.
Flare-Ups
The fat dripping from your burgers can ignite and cause flare-ups. Small ones are fine — they add a bit of flavor. Big ones that engulf your burger will leave it tasting like lighter fluid and soot. If a flare-up happens, move the burgers to the cooler zone of your two-zone setup and close the lid. Closing the lid cuts off oxygen and usually calms the flames within seconds.
Burgers That Puff Up in the Center
You forgot the thumbprint dimple, or it wasn’t deep enough. If you notice puffing early enough, you can gently press the center down with your spatula — this is the one time a gentle press is acceptable.
Burgers That Are Charred Outside but Raw Inside
Your grill is too hot. Move the burgers to the cooler zone, close the lid, and let them finish cooking with indirect heat. This is exactly what two-zone grilling is designed for. For future cooks, back the temperature down to 375°F instead of blasting at 500°F.
Dry, Tough Burgers
A few possible causes: you used too-lean meat (go 80/20 next time), you overcooked them (get a thermometer), or you pressed them on the grill (stop doing that). One or more of these is almost always the culprit.
Building the Burger: Assembly Tips
You’ve grilled a perfect patty. Now don’t ruin it with chaotic assembly.
There’s a logic to burger stacking that keeps everything together and balanced. Your bottom bun carries the most weight, so put your sturdier toppings there. A lettuce leaf on the bottom bun acts as a moisture barrier between the juicy patty and the bread. Tomato slices go above the patty where they won’t make the bottom bun soggy.
Condiments go on the top bun — ketchup, mustard, mayo, or whatever you prefer. This keeps them from dripping straight through before you even pick the burger up.
If you’re someone who loves exploring bold flavors and unique toppings, you might enjoy experimenting with options inspired by the best taco toppings and sauces. Pickled jalapeños, fresh cilantro, or even a chipotle mayo can take a grilled burger in a completely different direction.
Onions — raw or caramelized — go right on top of or beneath the cheese so they stick to the patty and don’t slide out with every bite. Pickles go near the top. Bacon (if you’re using it) goes directly on the patty under the cheese, so the cheese melts over it and locks it in place.
Grilling Burgers for a Crowd
Cooking two burgers is easy. Cooking twenty requires a different approach.
Keep patties cold until they go on the grill. If you shape all your patties ahead of time, layer them on a sheet pan with parchment paper between layers and keep them refrigerated. Cold patties hold their shape better on the grill and give you a wider window of control over doneness.
Cook in batches if your grill can’t fit all the burgers with adequate spacing. Crowding the grill drops the temperature and creates steaming instead of searing.
Stagger doneness requests. Put well-done burgers on first, then medium, then medium-rare. That way everything comes off the grill around the same time.
Set up a “holding zone” on the cool side of your grill (burner off) where finished burgers can stay warm without continuing to cook significantly. Don’t microwave burgers that have gone cold — just briefly warm them on the cooler side of the grill.
Planning a bigger gathering? If you’re building out a party menu that goes beyond burgers, comfort foods for a football watch party pairs really well with a burger spread.
FAQ
What temperature should a gas grill be for burgers?
Set your gas grill to medium-high heat, which is roughly 375–450°F. This range gives you a strong sear on the outside while allowing the inside to cook through at a reasonable pace. If your grill runs hot, stay closer to 375°F. You can always verify with the right temperature for cooking hamburgers for more specific guidance.
Should I grill burgers with the lid open or closed?
Closed. On a gas grill, closing the lid traps heat and creates convection — hot air circulates around the burger and cooks it more evenly from all sides. Opening the lid turns your grill into a flat-top where only the bottom cooks, which leads to uneven results and longer cook times. The only time to open the lid is to check, flip, or add cheese.
How do I keep burgers from falling apart on the grill?
Use ground beef with enough fat (80/20 is ideal), don’t overwork the meat when forming patties, and make sure your grill grates are hot and oiled before placing the burgers. Cold patties hold together better than room-temperature ones. And don’t flip too early — let the first side develop a proper sear so it holds together when you turn it.
Can I grill frozen burger patties on a gas grill?
You can, but the process is a bit different. Frozen patties need lower heat (around 325°F) and longer cooking time. Don’t try to thaw them on a screaming-hot grill — the outside will burn before the inside even defrosts. For a complete walkthrough, this guide on how to grill frozen burgers covers everything you need to know.
How many times should I flip a burger?
Once is enough for standard ¾-inch patties. Let the first side cook until juices pool on top, then flip and finish. Flipping repeatedly doesn’t improve cooking — it just disrupts the crust formation and makes it harder to track your timing.
Fire Up Your Grill with Confidence
Grilling burgers on a gas grill isn’t complicated once you nail the fundamentals: good meat, gentle patty shaping, a properly preheated grill with two-zone heat, one flip, and a thermometer to confirm doneness. That’s really the whole formula.
The next time you fire up your grill, skip the guesswork. Shape your patties with that thumbprint dimple, resist the urge to press them flat, and let the heat do its job. Your reward will be a burger that’s crusty on the outside, juicy on the inside, and exactly the doneness you wanted.
And once you’ve mastered the gas grill, maybe try your hand at a pellet grill for hamburgers — it’s a whole different flavor experience worth exploring.