
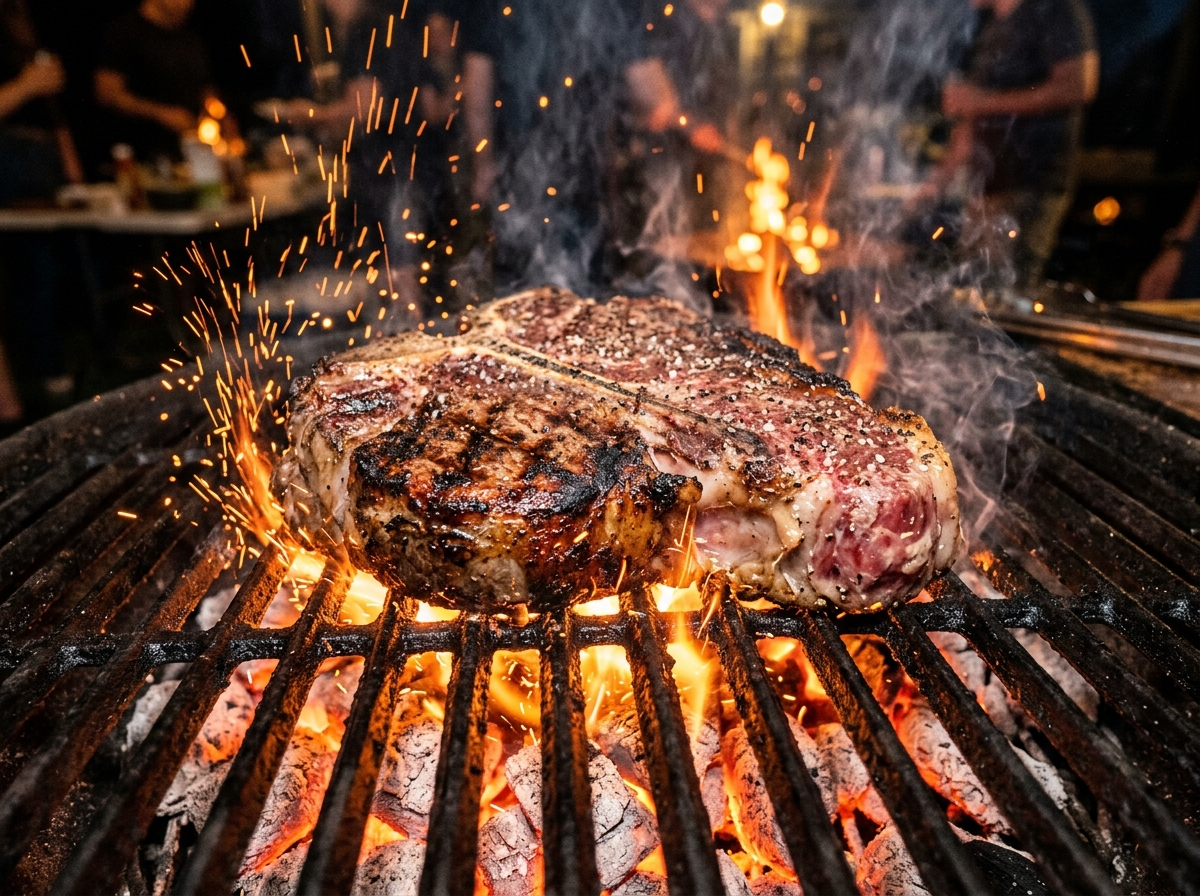
You bought a beautiful ribeye. You fired up the grill. You felt confident. Then you cut into it and found a gray, overcooked wall of meat with a cold red center. Sound familiar?
Grilling steak should not be stressful, but most people treat it like a high-wire act because they’re working with guesswork instead of a plan. The good news is that a great grilled steak comes down to a handful of decisions you make before the meat ever touches the grates. Get those right, and the actual cooking part is almost easy.
Here’s everything you need to know about how to grill steak — from choosing your cut to pulling it off the heat at exactly the right moment.
Choose the Right Steak
Your steak’s fate is mostly sealed before you light the grill. The cut you pick determines how forgiving the cooking process will be, and thickness matters far more than most people realize.
Go for at least one inch thick. This is the single biggest favor you can do yourself. A thin steak — anything under three-quarters of an inch — cooks so fast that you have almost no margin for error. By the time you get a decent sear on the outside, the inside is already well done. A thicker steak gives you a window of time to build a crust while keeping the interior where you want it.
As for the cut itself, you have a few reliable options. A ribeye is the most forgiving because its marbling (those white streaks of fat running through the meat) bastes the steak from the inside as it cooks. A New York strip is leaner but still has a good fat cap along one edge, giving you strong beefy flavor without quite as much richness. A filet mignon is incredibly tender but very lean, which means it can dry out faster if you overshoot the temperature. A sirloin is the budget-friendly workhorse — less marbling, but plenty of flavor if you don’t overcook it.
If you’re newer to grilling, start with a ribeye or a strip. They’re more forgiving, and the fat content makes it harder to end up with a dry, disappointing result.
Prep Your Steak Before It Hits the Grill
This is where most people either overcomplicate things or skip steps entirely. You don’t need a 24-hour marinade or a complicated spice rub to grill a great steak. You need salt, time, and a dry surface.
Salt your steak early. Ideally, salt it at least 40 minutes before grilling, or even the night before if you can plan ahead. When you first salt a steak, moisture beads up on the surface. If you throw it on the grill right then, that moisture steams the meat instead of letting it sear. But if you wait, the steak reabsorbs that salty liquid, and the surface dries back out. The result is better seasoning throughout and a much better crust. If you want to dig deeper into the timing and technique behind this, our guide to seasoning with salt breaks down exactly what’s happening at each stage.
Should you use a marinade or a dry rub? For a good-quality steak, simple is better. A heavy marinade can mask the flavor of the beef, and a thick rub can burn on a hot grill. If you’re curious about when each approach makes sense, this marinade vs. rub breakdown walks through the trade-offs. For most steaks, coarse salt and freshly cracked black pepper are all you need.
Pat the steak dry right before it goes on the grill. Use a paper towel and press firmly on all sides. Surface moisture is the enemy of a good sear. The Maillard reaction — the chemical process that creates that brown, flavorful crust — happens at around 300°F, and water caps the surface temperature at 212°F until it evaporates. A dry steak sears faster and more evenly.
One more note on the “let it come to room temperature” advice you’ll see everywhere. The idea is sound in theory — a cold center takes longer to cook — but in practice, a steak sitting on the counter for 30 to 45 minutes only warms up a few degrees internally. It’s not going to make or break your cook. Don’t stress about it, but don’t pull a steak straight from a 34°F fridge and throw it on a screaming-hot grill either. Give it the time it takes you to get the grill ready, and you’ll be fine.
Set Up Your Grill the Right Way
The biggest mistake I see at backyard cookouts is people cranking every burner to high and plopping the steak directly over the flames. That gives you a charred outside and a raw inside, and it also causes flare-ups that deposit sooty, bitter flavors on the meat.
What you want is a two-zone fire. On a gas grill, that means turning one or two burners to high and leaving the other side on low or off entirely. On a charcoal grill, pile the coals on one side of the kettle and leave the other side empty. The hot side is for searing. The cool side is for gently bringing the steak up to your target temperature without burning the exterior.
This setup gives you control. If the steak is searing too fast, you slide it to the cool side. If it needs more color, you move it back. You’re not locked into one temperature the entire cook, which is the whole reason grilling is different from traditional BBQ — you’re using direct, high heat for a relatively short time, and managing that heat is the skill that separates a good steak from a great one.
Aim for a grill grate temperature of around 450°F to 500°F on the hot side. If you’re using a gas grill, let it preheat with the lid closed for at least 10 to 15 minutes. If you’re on charcoal, wait until the coals are covered in gray ash and radiating serious heat when you hold your hand a few inches above the grate.
Clean your grates with a stiff brush right before the steak goes on, then lightly oil them with a folded paper towel dipped in a high-smoke-point oil like canola or avocado. This prevents sticking and helps with those clean grill marks everyone loves.
How to Grill Steak: Timing, Temps, and Technique
Here’s the part everyone jumps to, and here’s the honest truth: time is a terrible way to judge doneness. I know that’s not what you want to hear when you’re standing over a hot grill with tongs in your hand, but hear me out.
How long a steak takes to cook depends on its thickness, its starting temperature, the actual heat of your grill (which fluctuates with wind, ambient temperature, and how many times you’ve opened the lid), and even the cut of meat. A one-inch ribeye and a one-inch filet mignon will cook at different rates because of their fat content and density. Giving you a single number of minutes per side would be doing you a disservice.
That said, I’ll give you rough guidelines because I know you want a starting point. For a one-inch-thick steak over direct high heat, you’re looking at roughly 3 to 4 minutes per side for medium rare. A 1.5-inch steak will need closer to 5 to 6 minutes per side, and you’ll probably want to finish it on the cooler zone to avoid charring the outside before the center catches up.
But the only number that actually matters is the internal temperature, and the only reliable way to measure it is with an instant-read meat thermometer. Stick the probe into the thickest part of the steak, away from any bone or large pocket of fat.
Grilled Steak Temperature Guide
This is the grilled steak temperature guide I use every time I grill. These are pull temperatures — the temperature at which you should take the steak off the grill, not the final temperature after resting. The steak will continue to rise in temperature by about 5°F to 10°F as it rests, a phenomenon known as carryover cooking.
| Doneness | Pull Temp (°F) | Final Temp After Rest (°F) | Color & Texture |
|---|---|---|---|
| Rare | 120–125 | 125–130 | Cool red center, very soft |
| Medium Rare | 130–135 | 135–140 | Warm red center, tender |
| Medium | 140–145 | 145–150 | Warm pink center, slightly firm |
| Medium Well | 150–155 | 155–160 | Slight pink, mostly gray, firm |
| Well Done | 160+ | 165+ | No pink, very firm |
Food safety note: The USDA recommends cooking whole cuts of beef to a minimum internal temperature of 145°F followed by a 3-minute rest for food safety. You can read the full guidelines on the USDA Food Safety and Inspection Service page. Many steak lovers prefer medium rare at 130–135°F, which carries a slightly higher risk. This is a personal decision — just make sure you’re buying quality beef from a trusted source and that your thermometer is accurate.
Getting the Sear Right
The crust on a grilled steak is arguably the best part. That deep brown, slightly crispy exterior is pure flavor, and it comes from the Maillard reaction I mentioned earlier. If you want to understand exactly what’s happening on a chemical level, our steak crust explainer goes into the science in plain language.
To get a great crust, you need three things: a dry surface, high heat, and patience. Place the steak on the hot zone and don’t touch it for at least two to three minutes. I know the urge to peek is strong. Resist it. Every time you lift the steak, you break contact with the hot grate and slow down the browning process.
As for the great “flip once vs. flip often” debate — both methods work. The flip-once method gives you more dramatic grill marks. Flipping every minute or so actually cooks the steak more evenly because neither side has time to cool down completely. Serious Eats and other test kitchens have confirmed this through repeated testing. Pick whichever approach feels more comfortable to you. The temperature reading is what matters, not the number of flips.
If you’re working with a thicker steak (1.5 inches or more), consider using the reverse sear method. Start the steak on the cool side of the grill with the lid closed, letting it slowly come up to about 10°F to 15°F below your target temperature. Then move it to the hot side for a quick 60- to 90-second sear per side. This gives you edge-to-edge pink with a gorgeous crust, and it’s much harder to overcook.
Rest Your Steak Before You Cut
This is the step most people skip, and it’s the step that ruins an otherwise perfect steak.
When you cut into a steak straight off the grill, a puddle of juice floods the cutting board. That juice was supposed to stay inside the meat. What’s happening is that the intense heat of grilling forces the muscle fibers to contract and squeeze moisture toward the center of the steak. If you slice immediately, all that liquid rushes out. If you wait, the fibers relax and redistribute the juices throughout the steak.
A good rule of thumb is to rest your steak for about half the time it spent on the grill, or at least five minutes for a standard steak and up to ten minutes for a thick cut. Tent it loosely with foil if you’re worried about it cooling too much, but don’t wrap it tightly — trapped steam will soften the crust you worked so hard to build.
During that rest, the internal temperature will continue to climb. This is called carryover cooking, and it’s the reason the temperature guide above lists pull temps that are lower than the final serving temps. A steak pulled at 130°F will typically settle around 135°F to 140°F after a five-minute rest. If you wait until the thermometer reads your target final temperature on the grill, you’ll overshoot by the time you sit down to eat.
The reason this matters so much is explained well in our guide to why resting meat matters, but the short version is this: a rested steak is juicier, more tender, and more evenly cooked from edge to center. It’s the easiest step in the entire process, and it makes the biggest difference in the final bite.
Frequently Asked Questions
How long do you grill a steak on each side?
For a one-inch steak over high heat, plan on roughly 3 to 4 minutes per side for medium rare. A 1.5-inch steak will need 5 to 6 minutes per side, often with some time on the cooler zone to finish. These are rough estimates, though. Your grill’s actual temperature, the steak’s starting temperature, and wind conditions all affect timing. Always use an instant-read thermometer to confirm doneness rather than relying on the clock.
What temperature should my grill be for steak?
Aim for 450°F to 500°F on the direct-heat side of your grill. This high temperature is what creates a fast, flavorful sear without overcooking the interior. Make sure you also have a cooler zone (around 250°F to 300°F) available for finishing thicker cuts or managing flare-ups. Preheat your grill with the lid closed for at least 10 to 15 minutes before cooking.
Should I close the grill lid when cooking steak?
It depends on the thickness of your steak and the method you’re using. For thin steaks (under one inch) cooked entirely over direct heat, you can leave the lid open — the cook is fast enough that you don’t need the oven-like environment a closed lid creates. For thicker steaks, especially if you’re using the two-zone or reverse sear method, close the lid when the steak is on the indirect side. This traps heat and helps the center cook more evenly without charring the exterior.
Do I need to oil the steak or the grill grates?
Oil the grates, not the steak. A lightly oiled grate prevents sticking and helps with browning. Use a folded paper towel dipped in a high-smoke-point oil like canola, grapeseed, or avocado, and wipe it across the hot grates right before you place the steak. Oiling the steak itself can cause excessive flare-ups when the oil drips onto the flames.
Your Next Steak Starts Here
Grilling a great steak isn’t about expensive equipment or complicated techniques. It’s about making a few smart choices — a thick cut, early salting, a two-zone fire, and a reliable thermometer — and then having the patience to let the steak rest before you cut into it.
The next time you’re standing in front of the meat case, grab a one-inch ribeye, salt it when you get home, and fire up the grill with a hot side and a cool side. Pull it at 130°F, let it rest for five minutes, and slice against the grain. You’ll wonder why you ever stressed about it in the first place.
Now go light the grill. Your steak is waiting.

1 Comment