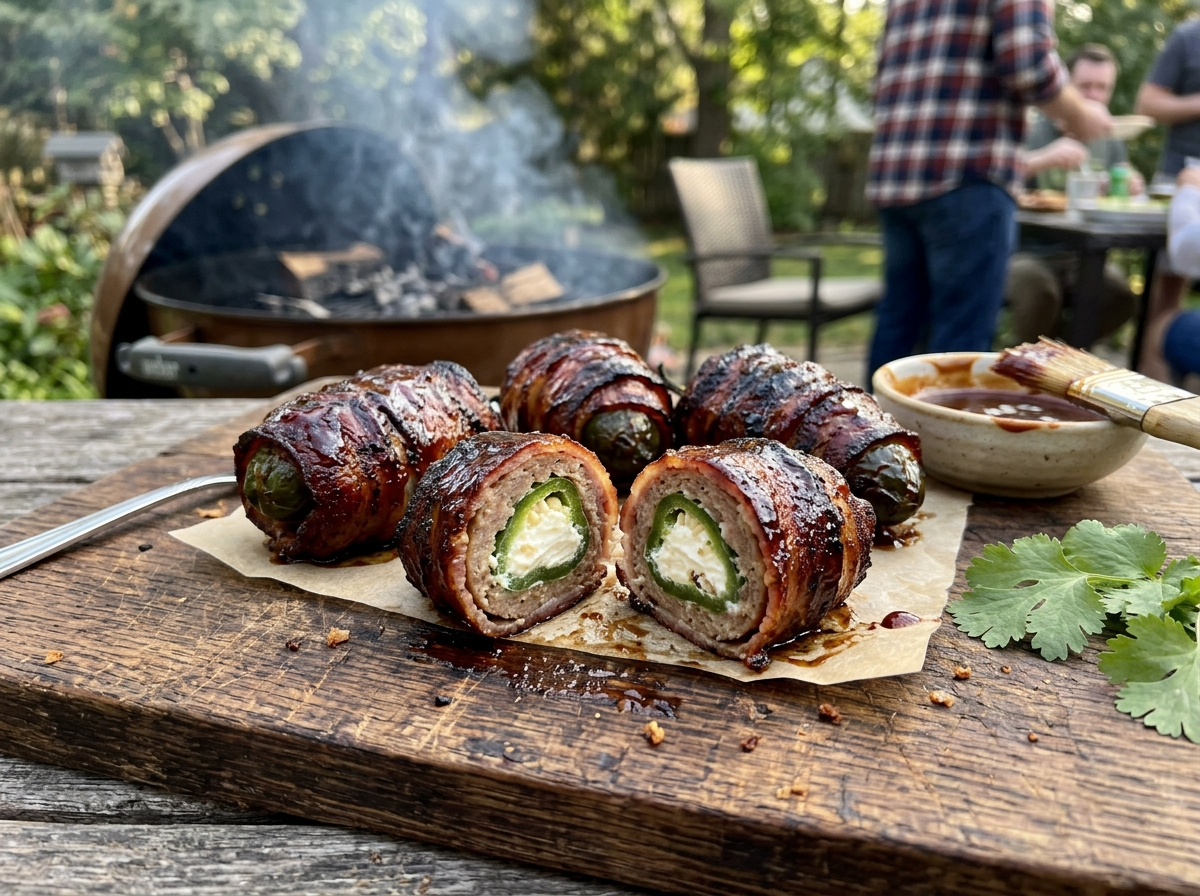
Picture this. You open your smoker, and there they sit — plump, golden-brown bundles of bacon hugging a charred jalapeño, with just a whisper of melted cheese peeking through the seams. You pick one up, it’s warm and heavy in your hand, and the first bite hits you with smoke, spice, salt, and creamy richness all at once. That’s an armadillo egg. And once you make a batch, you’ll wonder how you ever hosted a cookout without them.
Despite the name, no armadillos are involved. These are BBQ stuffed jalapeños — hollowed-out peppers filled with a sausage-and-cheese mixture, wrapped in bacon, and cooked low and slow until everything melds together. They’re a staple at Texas tailgates and backyard cookoffs, and they’re surprisingly easy to pull off at home. This article walks you through the whole process, from picking the right peppers to nailing the smoke.
What Are Armadillo Eggs, Anyway?
Armadillo eggs are a BBQ appetizer that sits right at the crossroads of jalapeño poppers and sausage bites. The basic idea is simple. You take a jalapeño, cut it in half lengthwise, scoop out the seeds and ribs, and pack the cavity with a mixture of cream cheese, shredded cheddar, and seasoned ground sausage. Then you wrap the whole thing in a strip of bacon and smoke it until the bacon crisps and the filling bubbles.
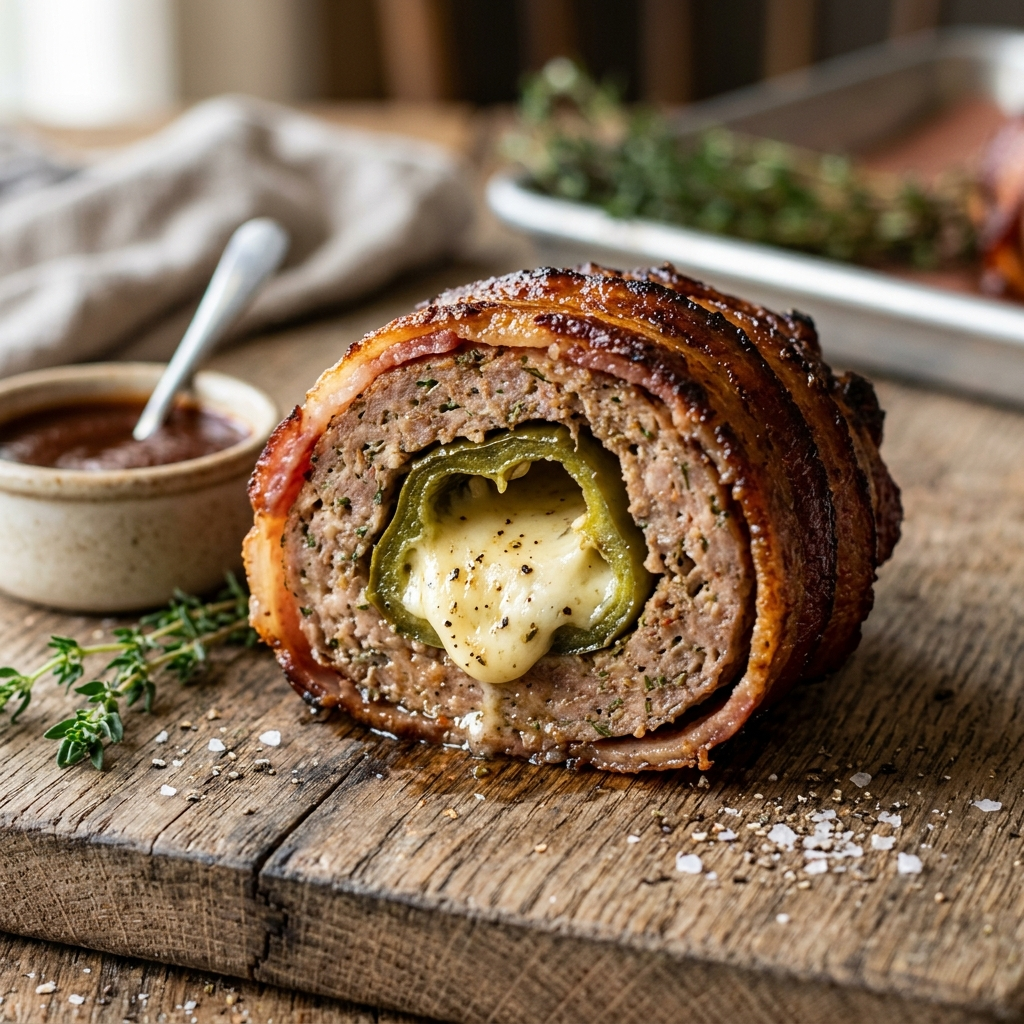
The name comes from the finished shape. Once the bacon wraps around the stuffed pepper and pulls tight during cooking, the whole thing looks like a small, round, armored egg — hence “armadillo egg.”
Now, you might be wondering how these differ from regular jalapeño popper armadillo eggs. The distinction is mostly about construction. A classic jalapeño popper is usually just a pepper half filled with cream cheese and maybe some breadcrumbs, then baked or fried. An armadillo egg adds the sausage layer and the bacon wrap, which gives it more heft, more smoke flavor, and a lot more going on in every bite. Think of poppers as the lighter cousin and armadillo eggs as the full BBQ treatment.
These show up most often at game days, cookouts, and competitive BBQ events across the South. They travel well, they reheat well, and they disappear from a platter faster than just about anything else you can put on a table.
Picking the Right Jalapeños (and Taming the Heat)
The pepper you choose makes or breaks this recipe, and there are two things to pay attention to: size and heat level.
You want jalapeños that are large enough to hold a decent amount of filling — roughly 3 to 4 inches long and wide enough that you can hollow them out without the walls collapsing. Skinny, curved peppers are frustrating to stuff and tend to split during cooking. Look for firm, glossy peppers with thick walls. If you’re shopping at a grocery store, the bigger bins near the front of the produce section usually have better options than the small pre-bagged ones.
Here’s a practical detail most recipes skip: jalapeño heat is wildly inconsistent. You can grab two peppers from the same pile, and one will be mild enough to eat raw while the other will make your eyes water. The heat lives mostly in the white ribs and the seeds, not the green flesh. So when you halve and hollow your peppers, the more of that white membrane you scrape out, the milder the final product will be.
How to Control the Spice Level
If you’re cooking for a crowd with mixed heat tolerance, here’s what works. Use a small spoon or a melon baller to scrape the ribs completely clean for a mild version. Leave a thin layer of membrane on a few peppers for the heat-seekers. You can also swap in milder peppers like Anaheims for part of the batch, though the flavor profile shifts a bit.
One more thing. Wear gloves when you’re prepping jalapeños. Capsaicin — the compound that makes peppers hot — sticks to your skin and does not wash off easily with soap and water. Touching your eyes or face after handling bare peppers is a mistake you only make once. The Scoville scale rates jalapeños between 2,500 and 8,000 units, which is moderate, but that range is wide enough to surprise you.
The Filling: Sausage, Cheese, and Seasoning
The filling is where you can really make this recipe your own, but the foundation is pretty standard. You need three components: a base of cream cheese for creaminess, a shredded melting cheese for stretch and flavor, and cooked ground sausage for savory depth.
Start with a block of cream cheese, softened to room temperature. Cold cream cheese won’t mix evenly and you’ll end up with lumps in your filling. Combine it with about a cup of sharp cheddar, shredded by hand if you can. Pre-shredded cheese is coated in anti-caking starch that keeps it from melting smoothly, and you want maximum melt here.
For the meat, ground pork sausage is the classic choice. You can use breakfast sausage for a slightly sweet, sage-forward flavor, or go with a hot Italian sausage if you want more kick. Brown the sausage in a skillet first, drain the excess fat, and let it cool slightly before folding it into the cheese mixture. If you mix hot sausage into cream cheese, the fat separates and you get a greasy filling that won’t hold its shape inside the pepper.
Why Cream Cheese Is Non-Negotiable
You might be tempted to swap cream cheese for something lighter, like ricotta or goat cheese. Don’t. Cream cheese has the right fat content and density to hold the filling together during a long smoke. Ricotta is too wet and will leak out. Goat cheese has a tang that fights the smoke flavor. Cream cheese acts as a binder and a buffer — it keeps the filling cohesive and it mellows the jalapeño heat just enough to keep things balanced. If you want to understand more about how fat carries and balances flavor in cooking, this piece on acid and fat as the yin and yang of cooking explains the science nicely.
For seasoning, keep it simple. A basic SPG blend — salt, pepper, garlic — is all you really need since the sausage already brings plenty of seasoning on its own. A pinch of smoked paprika or a dash of cumin works well if you want a little extra depth, but resist the urge to over-season. The bacon, the smoke, and the jalapeño are doing a lot of heavy lifting already.
Wrapping and Smoking Your Armadillo Eggs
Once your peppers are stuffed, it’s time to wrap them. Use thin-cut bacon — thick-cut takes too long to crisp and can leave you with rubbery, underdone strips by the time the filling is hot. Cut each bacon slice in half crosswise, then wrap one half-slice around each stuffed pepper half, spiraling it so the bacon overlaps slightly and covers as much of the exposed filling as possible. Secure the ends with a toothpick if the bacon doesn’t stay put on its own.
Now, the smoke. Set your smoker to 225–250°F using a mild wood like apple, cherry, or pecan. Hickory works too but can overpower the delicate cheese filling if you’re not careful. Place the armadillo eggs on the grate cut-side up so the filling doesn’t spill out, and smoke them for about 90 minutes to two hours. This is a classic low-and-slow cook, and patience pays off. The bacon fat renders slowly, basting the pepper as it cooks, and the smoke penetrates the cheese in a way that high heat simply can’t replicate.
Getting the Bacon Crispy Without Burning the Pepper
Here’s the most common problem people run into with smoked armadillo eggs: the bacon finishes before the filling gets hot enough, or the filling gets hot but the bacon is still floppy. The fix is a two-stage cook. Smoke at 225°F for the first 60 to 75 minutes to build flavor and cook the pepper through, then crank the heat to 350–375°F for the last 15 to 20 minutes to crisp the bacon. You can also finish them under a broiler for two or three minutes if your bacon is being stubborn.
Food safety note: Because this recipe involves ground meat and dairy, internal temperature matters. The USDA recommends cooking ground pork to a minimum of 160°F. Use an instant-read thermometer to check the center of the filling, not just the bacon on the outside. For more on why hitting the right temperature is critical, see this overview of the food safety temperature danger zone. This is general cooking guidance — always follow current USDA food safety recommendations for your specific ingredients.
One more tip from experience: don’t overfill the peppers. The first time I made these, I packed the filling in like I was stuffing a suitcase, and about halfway through the smoke, the cheese started bubbling out and dripping onto the heat deflector. The result was a smoky, greasy mess on the bottom of my smoker and half-empty peppers on the grate. Fill the cavity just to the top of the pepper wall, not mounded above it. The filling expands slightly as it heats, and you need to leave room for that.
Oven and Grill Alternatives
Not everyone has a smoker, and that’s fine. You can make excellent armadillo eggs recipe variations on a gas grill or even in your kitchen oven.
For a gas grill, set it up for indirect heat — burners on one side, peppers on the other — and aim for about 300°F under the lid. You won’t get the same deep smoke flavor, but you can add a smoker box with wood chips to get some of that character back. Cook for roughly 45 to 60 minutes, then finish over direct heat for a few minutes to crisp the bacon.
For the oven, bake at 375°F on a wire rack set over a baking sheet. The rack is important because it lets air circulate around the bacon so it crisps on all sides instead of steaming in its own fat. Expect about 30 to 40 minutes. The peppers won’t have any smoke flavor, obviously, but the combination of sausage, cheese, bacon, and jalapeño is good enough to stand on its own. A light sprinkle of smoked paprika on top before baking helps fake the smokiness a bit.
If you want to understand what’s happening to the meat proteins during these different cooking methods, this breakdown of how heat affects muscle fibers in meat gives you the science behind the texture changes.
Serving, Storing, and Reheating
Armadillo eggs are best served warm, about 10 minutes after they come off the heat. That short rest lets the filling set up so it doesn’t pour out when someone bites in. If you’re curious about why resting matters for all kinds of cooked meat and stuffed dishes, this explanation of carryover cooking covers the mechanics.
For serving, arrange them on a platter with a few dipping sauces on the side. Ranch dressing, chipotle aioli, and a simple salsa all pair well. You can also drizzle them with a little hot honey or BBQ sauce right before serving for extra gloss and sweetness.
Leftovers keep well in an airtight container in the fridge for three to four days. To reheat, skip the microwave — it turns the bacon soft and the pepper rubbery. Instead, pop them in a 350°F oven for about 10 minutes, or reheat them on a grill over medium indirect heat until the filling is warm and the bacon re-crisps.
If you’re making these ahead for a party, you can prep the stuffed and wrapped peppers up to 24 hours in advance and keep them covered in the fridge. Pull them out about 30 minutes before cooking to take the chill off, then smoke or bake as directed. This make-ahead approach actually works in your favor because the flavors have more time to meld.
Frequently Asked Questions
What’s the difference between armadillo eggs and jalapeño poppers?
Jalapeño poppers are typically pepper halves filled with cream cheese and breadcrumbs, then baked or fried. Armadillo eggs go further by adding a seasoned sausage layer to the filling and wrapping the whole thing in bacon before smoking. The result is meatier, smokier, and more substantial — closer to a BBQ appetizer than a simple bar snack.
Can I use something other than pork sausage in the filling?
Absolutely. Ground turkey, chicken sausage, or even crumbled chorizo all work well. Chorizo adds a bold, smoky-spicy flavor that pairs especially well with the jalapeño. Just make sure whatever meat you use is fully cooked and drained before mixing it into the cheese, since the smoking time is designed to heat the filling through, not cook raw meat from scratch.
How do I keep the cheese from leaking out during cooking?
Two things help. First, don’t overfill the peppers — fill the cavity level with the pepper walls, not above them. Second, make sure the bacon wrap covers the exposed filling as completely as possible. The bacon acts as a structural cage that holds everything in place as the cheese melts. If you still get some leakage, it’s not a disaster. The cheese crisps up on the outside and tastes great, even if the presentation isn’t perfect.
Fire up your smoker this weekend and give these a shot. The process is forgiving, the ingredients are cheap, and the payoff is one of those appetizers that makes people stop mid-conversation and ask what they’re eating. Start with a small batch, figure out your preferred heat level, and tweak the filling to match your taste. Once you’ve got your version dialed in, you’ll be the person everyone asks to bring the appetizers.