A burger that’s pink and juicy on the inside but perfectly seared on the outside doesn’t happen by accident. It happens because someone paid attention to temperature. And yet, most backyard grillers still rely on guesswork — pressing the patty with a spatula, cutting it open, or just hoping for the best. That’s exactly how you end up with either a raw center or a dry hockey puck.
Getting the right burger temp on grill is the single most important thing standing between you and a truly great burger. It affects the taste, the texture, the juiciness — and yes, the safety too. The USDA recommends cooking ground beef to an internal temperature of 160°F, and there’s solid science behind that number. But there’s also a whole world of doneness levels that experienced grillers swear by.
This article walks you through everything — what temperatures mean what, how your grill setup plays a role, and the real-world tricks that make a noticeable difference. No fluff. Just stuff that actually works when you’re standing in front of a hot grill with hungry people waiting.
Why Temperature Matters More Than Timing
Here’s something a lot of people get wrong: they focus on how long to cook a burger instead of what temperature the burger reaches inside. Time is unreliable. A half-inch thick patty and a one-inch thick patty need completely different cook times — even on the same grill, at the same heat.
Temperature, on the other hand, tells you exactly where that patty stands. It’s objective. It’s precise. And it protects you from two things you don’t want — an unsafe burger or an overdone one.
Ground beef is different from a steak. With a steak, bacteria mostly live on the surface, so searing the outside handles the safety issue. But with ground beef, the grinding process can push bacteria throughout the meat. That’s why internal temp matters so much with burgers specifically.
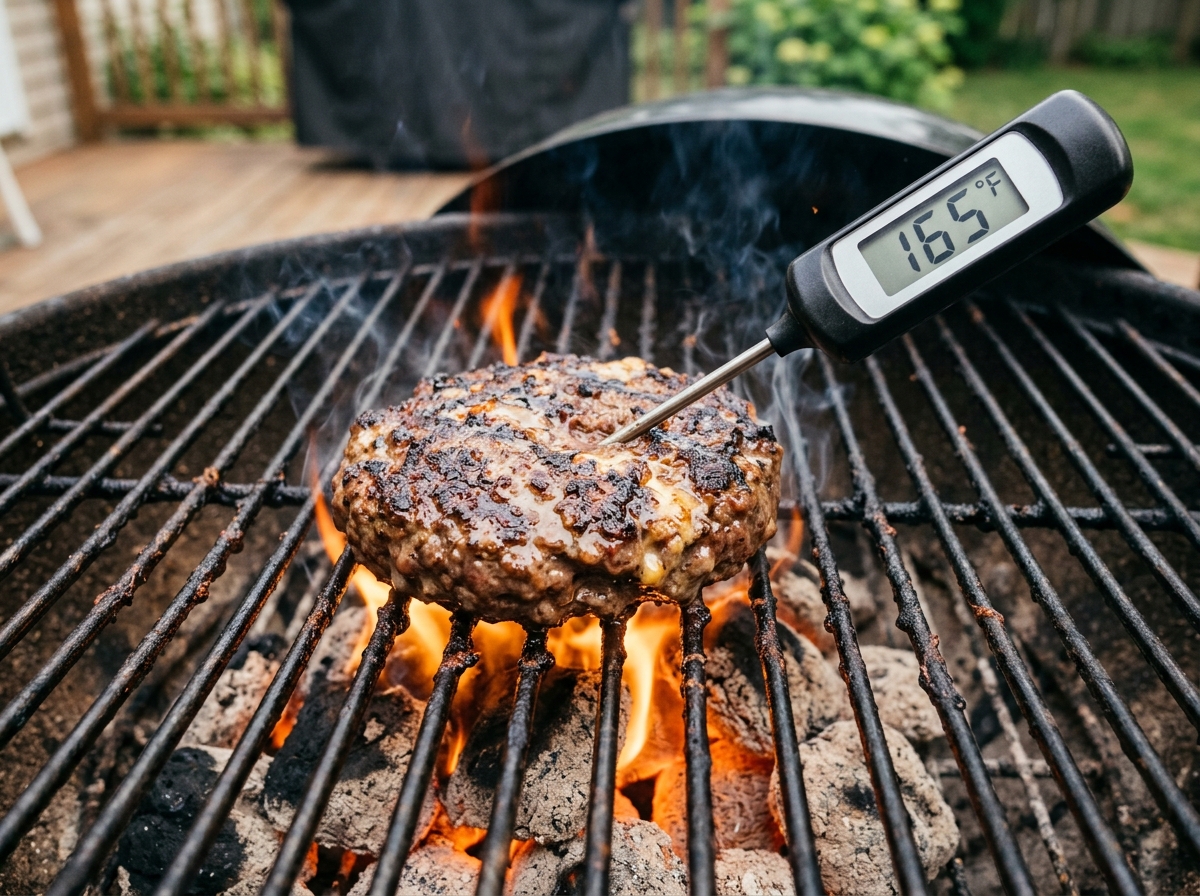
A good instant-read meat thermometer is the tool you need here. They’re cheap — you can find reliable ones for under $15 — and they take the guesswork out completely. If you’ve been cooking burgers without one, you’ve been flying blind.
Pro Tip: Insert the thermometer through the side of the patty, not from the top. You want the probe tip sitting right in the center, the thickest part. That gives you the most accurate reading.
The Right Burger Temp on Grill for Every Doneness Level
Not everyone wants their burger cooked the same way. Some people love a blush of pink in the center. Others won’t touch anything that isn’t cooked all the way through. Both are valid — and both require you to know your target temperatures.
Here’s what each doneness level actually looks like inside, and the internal temperature you should aim for:
Rare (120°F–125°F)
The center is cool and red. The texture is very soft. Most food safety experts don’t recommend this for ground beef because it hasn’t reached a temperature high enough to kill potential pathogens. You’ll find this option at some high-end burger restaurants that grind their own meat fresh, but for a backyard grill? It’s a risk most people shouldn’t take.
Medium-Rare (130°F–135°F)
Warm red center, slightly firmer than rare. This is where a lot of burger enthusiasts land — the flavor is rich and the juiciness is at its peak. Again, it’s below the USDA’s recommended 160°F, so you’re accepting some risk here. If you go this route, use high-quality fresh-ground beef from a trusted butcher.
Medium (140°F–145°F)
This is the sweet spot for many people. You get a warm pink center with plenty of juice, and the texture is tender without being mushy. It’s not fully at the USDA guideline, but it’s a popular choice among experienced home cooks who understand the tradeoff.
Medium-Well (150°F–155°F)
Just a hint of pink remains. The burger is firmer and slightly less juicy, but still flavorful if you haven’t over-compressed the patty. A lot of families with kids default to this level — it’s close enough to the USDA recommendation to feel safe, and the texture is still pleasant.
Well Done (160°F+)
No pink at all. This is the USDA-recommended minimum internal temperature for ground beef. The burger is fully cooked through, and all harmful bacteria — including E. coli and Salmonella — are killed at this point. The challenge? Keeping it from drying out. We’ll get to that shortly.
Did you know? The reason the USDA specifically says 160°F for ground beef (but only 145°F for whole cuts like steak) is because of how the grinding process distributes bacteria. It’s not about being overly cautious — it’s based on actual microbiology.
If you want a detailed comparison of every level side by side, the burger temperature guide covering all doneness levels breaks it down really well with visual cues.
How to Set Up Your Grill for the Best Results
Temperature isn’t just about what’s happening inside the burger. It’s also about what’s happening on the grill surface and in the air around it. Your grill setup directly affects how evenly and effectively those patties cook.
Grill Temperature (The Heat Around the Burger)
Most burgers cook best with the grill running between 375°F and 450°F. That range gives you a good sear on the outside without torching the surface before the center catches up.
If you’re working with a gas grill, preheat it for at least 10–15 minutes with the lid closed. You want those grates hot before any patty touches them. For charcoal grills, wait until the coals are covered in a layer of white ash — that’s when they’re at their most consistent heat.
Want a step-by-step process for gas grills specifically? This guide on how to grill burgers on a gas grill covers the full setup, including vent positions and flare-up prevention.
Two-Zone Cooking
This is a technique that separates good grillers from great ones. Instead of spreading heat evenly across the entire grill, you create two zones — one hot (direct heat) and one cooler (indirect heat).
You sear the burger on the hot side for 2–3 minutes per side to build that crust, then move it to the cooler side to finish cooking through without burning. This method is especially useful for thick patties (¾ inch or more) where the center needs more time but the outside is already browned.
On a gas grill, just leave one burner on high and turn the other to low or off. On charcoal, push all the coals to one side. Simple as that.
Lid On or Off?
Keep the lid closed as much as possible. An open grill loses heat fast, and you need consistent ambient temperature for even cooking. Every time you lift the lid, you’re adding time and introducing uneven results. The only time you need the lid open is when you’re flipping or checking temp.
Thick vs. Thin Patties — How Thickness Changes Everything
A quarter-pound patty that’s half an inch thick and a half-pound patty that’s an inch thick are two completely different cooking projects. Treating them the same way is where a lot of people go wrong.
Thin Patties (⅓ inch to ½ inch)
These cook fast — really fast. You’re looking at about 2–3 minutes per side over direct high heat. The challenge isn’t getting them done; it’s keeping them from overcooking. With thin patties, the window between “perfect” and “overdone” is narrow.
Use high heat, flip once, and pull them off the grill the moment they hit your target temp. Don’t walk away to grab a drink. Don’t answer a text. These need your attention for those few minutes.
Thin patties work great for smash burgers. You press them flat on a screaming hot surface, and they develop an incredible crust while staying juicy inside.
Thick Patties (¾ inch to 1 inch)
Here’s where two-zone cooking earns its place. A thick patty on direct high heat will char on the outside while the center is still cold. You need to sear first, then move to indirect heat and close the lid.
Total cook time for a thick patty is usually 6–8 minutes per side, but that depends on your grill temp and the meat’s starting temperature. A patty straight from the fridge will take longer than one that’s been sitting at room temperature for 15–20 minutes.
Pro Tip: Make a small indent or thumbprint in the center of thick patties before grilling. Burgers puff up in the middle as they cook, and that dimple keeps them flat and even. You end up with a patty that makes better contact with the grill and cooks more uniformly.
For specific timing breakdowns, the article on how long to grill burgers gives you minute-by-minute guidance for different thicknesses.
Cooking Frozen Burgers? Here’s What Changes
Sometimes you don’t have fresh patties — and that’s fine. Frozen burgers are convenient, they store well, and they can taste great if you handle the temperature right. But the approach is a little different.
Don’t thaw them first. Seriously. Cooking frozen patties directly on the grill actually gives better results than thawing, which can make the outside mushy while the inside stays cold. The USDA confirms that cooking from frozen is perfectly safe — you just need to adjust your expectations on time.
Frozen burgers take roughly 50% longer than fresh ones. So if a fresh patty needs 5 minutes per side, a frozen one will need about 7–8 minutes per side. Keep the grill at 325°F to 350°F — a bit lower than usual — so the outside doesn’t burn before heat penetrates to the center.
And here’s the key: that internal temperature target doesn’t change. Frozen or fresh, you still need to hit 160°F for well done, or whatever your preferred doneness level calls for. The thermometer is your best friend here because frozen patties are even harder to judge by look or feel.
There’s a full breakdown on grilling frozen burgers that covers seasoning tips and common mistakes people make with frozen patties.
Turkey Burgers, Chicken Burgers, and Plant-Based — Different Meats, Different Temps
Beef isn’t the only burger on the grill these days. Turkey burgers, chicken burgers, and meatless patties are everywhere — and each one has its own temperature rules.
Turkey Burgers
The USDA recommends cooking all poultry — including ground turkey — to an internal temperature of 165°F. There’s no “medium-rare” option here. Turkey doesn’t have the fat content of beef, so it dries out faster. Keep the grill at a moderate 375°F and don’t overcook past 165°F.
Adding a little olive oil, Worcestershire sauce, or even some grated onion into the turkey mixture helps keep things moist. And resist the urge to press the patty down with your spatula — you’re literally squeezing out the juice.
For a focused guide, check out how long to grill turkey burgers — it covers timing, seasoning, and how to keep them from falling apart on the grill.
Chicken Burgers
Same deal as turkey — 165°F internal temp, no exceptions. Ground chicken is lean, which means it dries out even faster than turkey. Mixing in a binder like breadcrumbs or egg helps hold moisture and gives the patty a better texture.
Plant-Based Burgers
Brands like Beyond Meat and Impossible Burger have their own recommended temperatures, usually around 165°F internal. These patties don’t carry the same bacterial risks as raw meat, but cooking them to the right temp is still important for texture and flavor. Undercooked plant-based burgers taste gummy. Overcooked ones taste like cardboard.
There’s actually more to meatless burger temps than most people realize — temperature matters for meatless burgers digs into the details.
How to Use a Meat Thermometer the Right Way
Owning a thermometer and using it correctly are two different things. Here’s how to get an accurate reading every time.
First, insert the probe horizontally through the side of the burger, not straight down from the top. You want the tip of the probe to sit right in the geometric center of the patty — the thickest point that’s farthest from any surface. Going in from the top often puts the probe tip too close to the grill grate, giving you a reading that’s higher than the actual center temp.
Second, wait for the number to stabilize. Digital instant-read thermometers usually settle in 2–4 seconds. Don’t pull it out the instant you see a number flash.
Third, check more than one burger. If you’ve got six patties on the grill, they’re not all cooking at exactly the same rate. The one near the edge might be running 10°F behind the one directly over the flame. Spot-check at least two or three.
Warning: Don’t rely on those old bi-metal dial thermometers that came free with your grill. They’re slow, inaccurate, and the probe is too thick for a burger patty. Spend $12–15 on a digital instant-read — it’s the single best investment for your grilling game.
The Carryover Cooking Effect — Why You Should Pull Early
Here’s something that trips up a lot of people. Your burger keeps cooking after you take it off the grill.
The exterior of the patty is much hotter than the center. Once you remove it from heat, that residual energy continues flowing inward, raising the internal temperature by roughly 3°F to 5°F during the first few minutes of resting.
So if you want a finished temp of 160°F, pull the burger off at 155°F–157°F. Let it rest for 3–5 minutes, and it’ll coast right up to your target.
This matters more with thick patties than thin ones. A thin smash burger doesn’t carry over much because there’s not as much mass holding heat. But a thick, half-pound patty? That carryover is real and worth accounting for.
Resting also lets the juices redistribute inside the meat. If you bite into a burger the second it comes off the grill, those juices run out onto your plate (or your shirt). Give it a few minutes, and the moisture stays where it should — inside the burger.
Keeping Well-Done Burgers From Drying Out
Let’s be honest — well-done gets a bad reputation. And sometimes it’s deserved. A lot of well-done burgers taste like sawdust because people just blast them with heat until there’s no pink left, without thinking about moisture.
But well-done doesn’t have to mean dry. Here are a few things that make a real difference.
Choose the right fat content. An 80/20 blend (80% lean, 20% fat) is your best bet. That fat renders during cooking and keeps the burger moist even at higher internal temps. If you use 93/7 lean beef, you’re fighting a losing battle against dryness at 160°F.
Don’t over-handle the meat. The more you work ground beef — squeezing it, shaping it, packing it tight — the denser and tougher the cooked patty becomes. Form your patties gently. They should hold together but still feel a little loose.
Add moisture before cooking. A tablespoon of Worcestershire sauce or even a splash of beef broth mixed into the ground meat adds moisture that stays through cooking. Some people swear by mixing in a small amount of grated cold butter, which melts slowly during cooking and bastes the burger from the inside.
Use indirect heat for the finish. Sear both sides on high heat, then move the patty to the cooler zone and close the lid. This lets the center come up to 160°F gradually rather than shocking it with intense direct heat. Gradual cooking = less moisture loss.
A broader look at what temperature to cook hamburgers covers specific grill settings for different styles and preferences.
What About Grilling at Specific Temperatures?
Some recipes and guides tell you to set your grill to a specific number — 400°F, 450°F, 350°F. These are useful, but they’re not magic numbers. What matters is matching your grill temp to your patty thickness and desired doneness.
At 400°F, you get a good balance of sear and cook-through. It’s the most commonly recommended grill temperature for burgers of average thickness (about ¾ inch). At this heat, a fresh beef patty takes roughly 4–5 minutes per side to reach medium, or 6–7 minutes per side for well done.
If you’re curious about the 400°F approach specifically, there’s a detailed walkthrough on grilling burgers at 400°F that covers timing and technique.
At 450°F–500°F, you get a faster, more aggressive sear. This is good for thin patties or smash burgers where you want a crispy crust in under 3 minutes per side. Not ideal for thick patties — the outside will char before the center is ready.
At 325°F–350°F, you’re in low-and-slow territory. This works well for frozen burgers, extra-thick patties, or stuffed burgers where you need the heat to penetrate deep without scorching the surface.
Pellet grills add another variable because they use convection-style cooking with wood smoke. The flavor profile is different, and the temperature tends to be more consistent. If you’re working with a pellet grill, cooking hamburgers on a pellet grill has specific advice for that setup.
Quick Reference: Internal Temp Targets
For a fast visual reference — and this is especially handy to keep on your phone while you’re grilling — here’s the summary:
- Rare: 120°F–125°F (not recommended for ground beef by USDA)
- Medium-Rare: 130°F–135°F
- Medium: 140°F–145°F
- Medium-Well: 150°F–155°F
- Well Done: 160°F+ (USDA recommended minimum for ground beef)
- Turkey/Chicken Burgers: 165°F (mandatory)
- Plant-Based Patties: 165°F (for best texture)
For a printable version, the hamburger internal temp chart on the site is designed to be saved and referenced easily.
FAQ
What internal temperature should a burger be on the grill?
The USDA recommends 160°F as the minimum safe internal temperature for ground beef burgers. For poultry-based burgers like turkey or chicken, the target is 165°F. If you prefer medium or medium-rare, those are 140°F–145°F and 130°F–135°F respectively — but they come with a higher food safety risk since they’re below the USDA guideline.
How do I know my burger is done without a thermometer?
You can try the “touch test” — pressing the center of the patty and comparing the firmness to parts of your palm. A rare burger feels like the fleshy base of your thumb when your hand is relaxed; well done feels like that same spot when you press your pinky to your thumb. But honestly? This method is unreliable, especially for beginners. A digital thermometer costing less than $15 gives you certainty that no touch test can match.
Should I flip my burger more than once?
One flip is the classic approach, and it works well for most burgers. You sear one side, flip it once, and let the second side finish. Flipping multiple times can actually work too — some competition grillers flip every 60 seconds, arguing that it cooks more evenly. But for a backyard cook keeping things simple, one flip is plenty. Just don’t press the burger down after flipping. That doesn’t speed things up — it just pushes juice out.
Does the type of grill affect burger temperature?
The grill itself doesn’t change what internal temp you’re aiming for — 160°F is 160°F regardless. But the type of grill affects how you get there. Gas grills offer precise temperature control. Charcoal grills run hotter and give you more flavor from the smoke but are harder to regulate. Pellet grills provide consistent low-to-medium heat with wood-fired flavor. Each has its strengths, and the technique adjustments are about grill management, not the target temp itself.
Why are my burgers always dry?
Three common reasons: the meat is too lean (look for 80/20 ground beef), you’re cooking at too high a temp for too long, or you’re pressing the patties down with a spatula during cooking. That pressing motion squeezes out fat and moisture — exactly the stuff that makes a burger taste good. Use the right fat content, pull the burger at the correct temp (accounting for carryover), and let it rest before serving.
Your Next Cookout Starts With a Number
Getting the burger temp on grill right isn’t about being fancy or following complicated rules. It’s about one simple habit: checking the internal temperature with a thermometer before you pull that patty off the heat.
Everything else — the seasoning, the cheese, the bun, the toppings — builds on that foundation. A perfectly cooked patty makes all those extras shine. A badly cooked one makes them irrelevant.
So next time you fire up the grill, skip the guessing. Grab a thermometer, know your target temp, and cook with confidence. Your burgers — and the people eating them — will thank you for it.