Most people don’t even realize you can make hotdogs at home. We’ve grown so used to grabbing a pack from the grocery store that the idea of making your own feels almost strange. But here’s something worth thinking about — the average store-bought hotdog contains anywhere from 20 to 30 ingredients, including fillers, preservatives, and additives that most of us can’t even pronounce. A homemade hotdog? You control everything. The meat, the spices, the texture, the flavor.
And the best part? It’s genuinely not that hard. You don’t need a culinary degree or fancy equipment. A basic meat grinder, some natural casings, and good-quality meat — that’s really the core of it. Once you try a hotdog you’ve made yourself, the store-bought ones start tasting like cardboard.
This guide walks you through the entire process — from picking the right meat to stuffing the casings to cooking them perfectly. Whether you’re a weekend grilling enthusiast, a parent who wants to know exactly what’s going into your kid’s food, or someone who just loves a good DIY food project, you’re in the right place.
What Exactly Goes Into a Homemade Hotdog?
Let’s start with the basics, because there’s a lot of mystery around what a hotdog actually is.
A traditional hotdog is an emulsified sausage. That sounds fancy, but all it means is that the meat is ground so finely that it forms a smooth, uniform paste — almost like a thick batter — before it gets stuffed into a casing. Think of it like making a very smooth meatloaf mixture, except you’re piping it into a thin tube.
The key components are simple: ground meat, fat, salt, spices, a curing agent (optional), and ice-cold water. That’s it. The magic is in the technique, not in some secret ingredient list.
Store-bought brands often add corn syrup, sodium phosphates, sodium erythorbate, and mechanically separated poultry. Your homemade version skips all of that. You know exactly what’s inside because you put it there.
Quick Fact: The National Hot Dog and Sausage Council (yes, that’s a real organization) estimates Americans eat about 20 billion hotdogs every year. Imagine how many of those could taste significantly better if people made them at home.
Choosing the Right Meat and Fat Ratio
This is where your hotdog’s flavor is born. Get this step right, and everything else falls into place.
The classic choice is a blend of beef and pork. Beef gives you that deep, savory flavor, while pork adds juiciness and a slightly sweeter undertone. A 50/50 split works beautifully for most people, but you can adjust based on your taste. Want something bolder? Go 70% beef, 30% pork. Prefer a milder, more traditional ballpark flavor? Flip that ratio.
You can also make all-beef hotdogs — and they’re fantastic. They tend to have a firmer snap and a more robust taste. All-pork versions are softer and a bit more delicate. Some people even experiment with chicken or turkey for a leaner option, though you’ll need to compensate for the lower fat content.
Speaking of fat — don’t be afraid of it. A good hotdog needs around 25–30% fat content to taste right. If you go too lean, you’ll end up with a dry, crumbly sausage that nobody wants to eat. Fat is what gives a hotdog that juicy burst when you bite into it. It carries the flavor and creates that smooth, emulsified texture.
Pro Tip: Ask your butcher for pork back fat or beef fat trimmings. They’re usually inexpensive, and they make a massive difference in the final product. If you’re grinding your own meat, cut it into small cubes and keep everything ice-cold — we’ll talk about why temperature matters so much in a minute.
If you’re someone who enjoys working with different types of meat for recipes, you already know that the cut and quality of meat changes everything about the final dish.
The Spice Blend That Makes It a Hotdog
A hotdog without the right spices is just a bland sausage in a tube. The spice blend is what gives it that unmistakable “hotdog taste” — the one that reminds you of baseball games, summer cookouts, and street carts.
The foundation of a classic hotdog seasoning relies on a handful of pantry staples. Paprika is the backbone — it gives color and a mild sweetness. Garlic powder adds depth without being overpowering. Onion powder brings a subtle savory note. Ground mustard seed contributes that slight tang that’s hard to place but essential. White pepper provides heat without the dark specks of black pepper, keeping the appearance clean. And a touch of ground coriander ties everything together with a light citrusy warmth.
For a batch using about 2 pounds of meat, a good starting point is roughly 1 tablespoon of paprika, 1 teaspoon each of garlic powder and onion powder, ¾ teaspoon of ground mustard, ½ teaspoon of white pepper, and ¼ teaspoon of coriander. You’ll also need about 1 tablespoon of kosher salt — adjust to taste, but don’t under-salt. Salt does more than flavor the hotdog; it helps bind the proteins together during the emulsification process.
Some recipes call for curing salt (Prague Powder #1 or Instacure #1), which contains sodium nitrite. This is what gives commercial hotdogs their pink color and that distinct “cured” flavor. Without it, your hotdog will look more grayish-brown after cooking — still perfectly safe and tasty, just different. If you use curing salt, the standard ratio is about 1 teaspoon per 5 pounds of meat. Don’t exceed this. Curing salt is measured precisely for a reason.
Did you know? That iconic pink color you associate with hotdogs isn’t from the meat itself — it’s a chemical reaction between sodium nitrite and the myoglobin in the meat. If you skip the curing salt, you’ll get a more natural color but the same great homemade flavor.
Want to get creative? Add a pinch of mace or nutmeg for a slightly European-style frank. A small amount of sugar — maybe a teaspoon — can round out the flavors nicely. Some people even add a tiny bit of liquid smoke if they want that smoky barbecue vibe without actually smoking the sausage.
Why Temperature Control Is Everything
Here’s something that trips up a lot of first-timers: temperature is the single most critical factor in making a good hotdog. Not the spice blend, not the casing, not the grinder. Temperature.
When you emulsify meat, you’re essentially creating a stable mixture of protein, fat, and water. If the mixture gets too warm during grinding and processing, the fat separates from the protein. The result? A grainy, crumbly hotdog that falls apart when you cook it. You want everything to stay below 40°F (4°C) throughout the entire process.
Start by cutting your meat and fat into small cubes — about 1-inch pieces — and spreading them on a sheet pan. Put them in the freezer for 30 to 45 minutes before grinding. You want them very cold, even slightly icy on the edges, but not frozen solid. Do the same with your grinder parts — the blade, the plate, the housing. Cold equipment prevents friction heat from warming up the meat.
When you blend the ground meat into a paste (using a food processor or a stand mixer), add ice-cold water — some people use actual crushed ice — a little at a time. The water serves two purposes: it keeps the temperature down, and it adds moisture that creates steam during cooking, giving you a plumper, juicier hotdog. For every 2 pounds of meat, use about ¾ cup to 1 cup of ice water.
Warning: If your meat mixture starts looking greasy or separated during processing, it’s gotten too warm. Stop immediately, spread the mixture on a pan, and put it back in the freezer for 15 minutes. Then try again. Patience here saves the whole batch.
Grinding and Emulsifying: Getting That Smooth Texture
The texture of a hotdog is what sets it apart from, say, a bratwurst or Italian sausage. Those sausages have a coarser grind — you can see and feel the individual pieces of meat. A hotdog should be completely smooth, almost mousse-like before cooking.
To get there, you’ll grind the meat twice. The first pass goes through a coarse grinding plate (about ¼ inch or 6mm). The second pass goes through a fine plate (about ⅛ inch or 3mm). After double-grinding, the mixture needs to be processed further — either in a food processor or using the paddle attachment on a stand mixer — until it becomes a smooth, sticky paste.
If you’re using a food processor, work in batches. Don’t overload the bowl, or you’ll get uneven results. Process each batch for about 2 minutes, scraping down the sides once or twice. You’ll know it’s ready when the mixture looks uniform and sticks to the sides of the bowl like a thick paste.
During this stage, add your spice blend and ice water gradually. The mixture should look glossy and cohesive — not dry, not soupy, but somewhere in between. If you pinch a small amount and press it between your fingers, it should feel smooth with no gritty bits of meat.
Pro Tip: Before you stuff the entire batch into casings, take a small spoonful of the mixture and fry it in a pan. Taste it. Adjust the salt and spices now, while you still can. Once it’s in the casing, there’s no going back.
Casings: Natural vs. Collagen vs. No Casing at All
The casing is what gives a hotdog its shape — and more importantly, that satisfying snap when you bite through it. You’ve got three main options.
Natural casings are the traditional choice and what most hotdog purists swear by. They’re made from sheep intestines (for smaller-diameter hotdogs) or hog intestines (for larger ones). Sheep casings, typically 22–24mm in diameter, are the standard for a classic hotdog size. They come packed in salt and need to be soaked in warm water for about 30 minutes before use. The texture they create is unmatched — a thin, delicate skin that gives way with a clean snap. You can find them at butcher shops, specialty food stores, or online.
Collagen casings are manufactured from animal collagen (usually from cow hides). They’re more uniform in size, easier to work with, and don’t require soaking. The snap isn’t quite as pronounced as natural casings, but it’s still good. They’re a solid choice if you’re new to sausage-making and want something more forgiving.
No casing? Yes, that’s an option too. You can shape the meat mixture into logs using plastic wrap, roll them tightly into a cylinder, and poach them directly in the wrap. Once cooked, you remove the plastic and you’ve got a casing-free hotdog. The texture is softer — no snap — but the flavor is identical. This method works well for people who can’t find casings or simply don’t want to bother with them.
Stuffing the Casings (Without Losing Your Mind)
Stuffing sausage casings is one of those things that feels clumsy the first time and becomes second nature by the third batch. Don’t stress about perfection — even professional sausage makers had a learning curve.
You’ll need a sausage stuffer attachment for your meat grinder, or a dedicated sausage stuffer. Stand mixer grinder attachments usually come with stuffing tubes in different sizes. For hotdog-sized casings, use the smallest tube available.
Slide the entire length of soaked casing onto the stuffing tube, leaving about 2 inches hanging off the end. Don’t tie the end yet — leave it open so air can escape as the meat fills the casing. Start feeding your meat paste through the grinder or stuffer slowly. As the casing fills, it will slide off the tube on its own. Your job is to control the speed and keep gentle, even pressure so the casing fills uniformly without air pockets.
How tight should they be? Firm but not bursting. You want a little give when you press gently. If you overstuff, the casings will burst during cooking. If you understuff, you’ll get wrinkly, sad-looking hotdogs. Somewhere in between is the sweet spot.
Once you’ve filled the casing, you’ll have one long coil of sausage. Now you twist it into individual links — about 6 inches is standard hotdog length. Pinch the casing at 6-inch intervals and twist each link 3-4 full rotations. Alternate the direction of your twist (clockwise, then counter-clockwise) so they don’t unravel.
Don’t panic about air bubbles. If you see small air pockets, just prick them gently with a sterilized pin or toothpick. The tiny hole will seal during cooking.
Cooking Your Homemade Hotdogs the Right Way
You’ve done the hard work. Now let’s cook these properly, because the cooking method matters a lot for homemade hotdogs.
Poaching First (The Important Step Most People Skip)
Unlike store-bought hotdogs — which are fully cooked during manufacturing — your homemade ones are raw and need to be cooked through before eating. The best way to do this is poaching, which gently cooks the hotdog all the way through without splitting the casing.
Fill a large pot with water and heat it to 160–170°F (71–77°C). This is below a simmer — you should see tiny bubbles forming on the bottom of the pot, but the water shouldn’t be actively bubbling. Place your hotdogs in the water and cook for about 20 to 25 minutes, or until the internal temperature reaches 160°F (71°C).
Warning: Don’t boil them. Boiling water will cause the casings to burst and the fat to render out, leaving you with tough, dry hotdogs. Low and slow is the key here.
After poaching, you can eat them immediately or — and here’s a trick the pros use — plunge them into an ice bath for a few minutes to stop the cooking and set the casing. This firms up the snap. Once cooled, you can refrigerate them for up to a week or freeze them for a couple of months.
Grilling (The Classic Way)
Once your hotdogs are poached and cooled, grilling is where the magic happens. You’re essentially reheating them and adding char, since they’re already fully cooked inside.
Preheat your grill to medium heat — around 350–400°F. Place the hotdogs on the grate and cook for about 5 to 7 minutes, turning frequently to get even browning on all sides. You want nice grill marks and a slightly crispy exterior without drying them out.
If you’re already comfortable with grilling and enjoy getting your temperatures right, you might appreciate our burger temperature guide for grilling — the same attention to detail applies here.
Pan-Frying
Heat a skillet over medium heat with a light drizzle of oil or butter. Cook the hotdogs for 4 to 6 minutes, rolling them around occasionally so all sides get some color. Pan-frying gives you a slightly different texture than grilling — a more uniform golden-brown crust.
If pan-frying is your jam, you might also enjoy learning how to fry at home without deep frying, which covers some useful techniques for getting great results in a regular skillet.
Smoking (For the Adventurous)
If you have a smoker, this is where homemade hotdogs really shine. After stuffing, skip the poaching step and place your raw hotdogs directly in the smoker at 225°F (107°C) using a mild wood like apple, cherry, or hickory. Smoke them for about 1 to 2 hours until the internal temperature hits 160°F. The result is a deeply flavored, smoky hotdog that tastes nothing like anything from a store.
What to Put on Your Homemade Hotdog
A great hotdog deserves great toppings. And honestly, once you’ve made the hotdog yourself, you’ll probably want to put more thought into what goes on top.
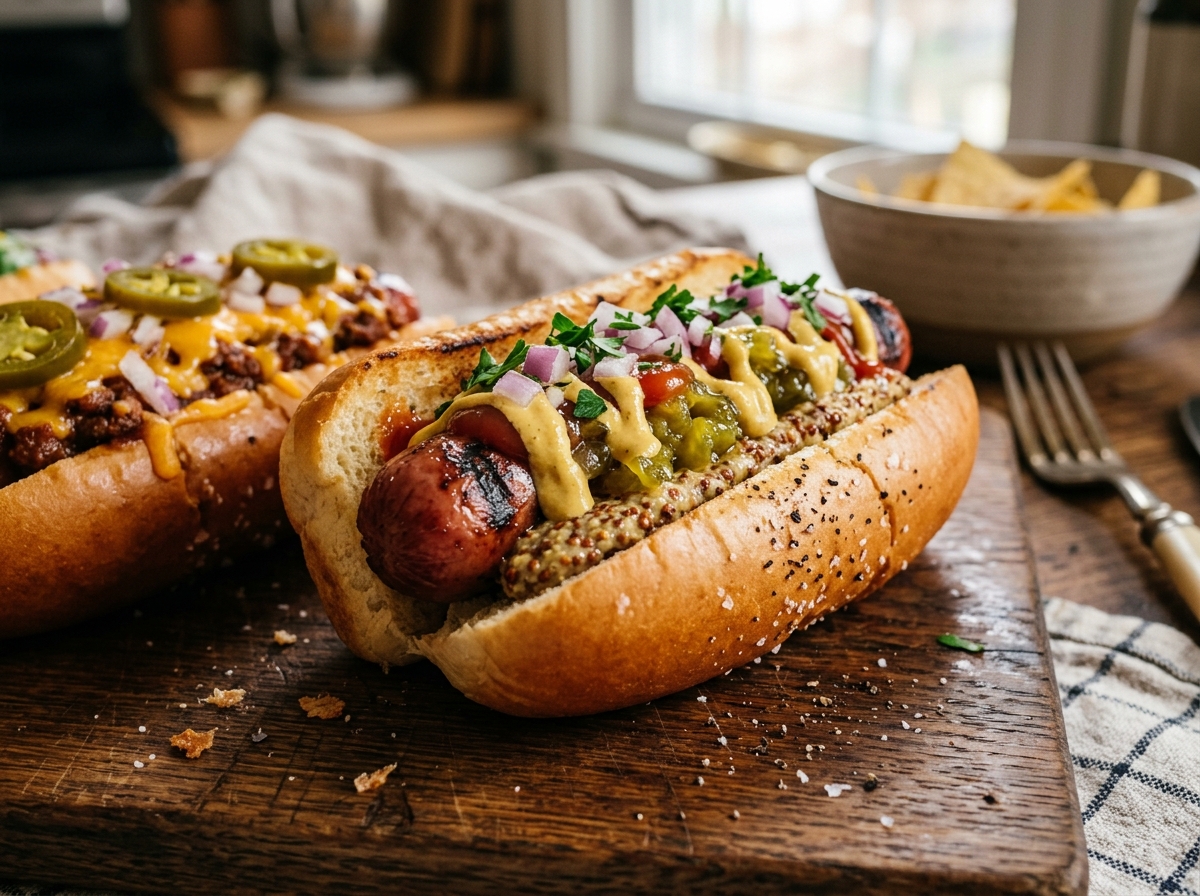
The classic American approach is simple — yellow mustard, ketchup, and relish. Nothing wrong with that. But you’ve got options.
A Chicago-style dog uses yellow mustard, neon-green relish, chopped onions, tomato slices, a dill pickle spear, sport peppers, and celery salt — all on a poppy seed bun. Ketchup is famously forbidden.
A New York-style pushcart dog gets sauerkraut, spicy brown mustard, and sometimes onion sauce. Simple and perfect.
If you’re feeling creative, try a Mexican-inspired hotdog — wrap it in bacon, grill it, and top it with pico de gallo, crema, jalapeños, and a squeeze of lime. If you love bold, layered flavors like the ones you find in authentic Mexican tacos, this style will feel right at home.
The beauty of making your own hotdogs is that you can match the flavors in the dog itself to the toppings. Made a smoky version? Top it with caramelized onions and chipotle mayo. Went with an all-beef frank? Classic mustard and sauerkraut let the meat shine. You can even take inspiration from some of the best taco toppings and adapt them for a hotdog — pickled onions, avocado crema, or a tangy slaw work surprisingly well.
Storing and Freezing Your Homemade Hotdogs
One batch of homemade hotdogs usually yields 12 to 20 links, depending on the size. You probably won’t eat them all in one sitting (though no judgment if you try).
Refrigerator: Poached hotdogs keep well in the fridge for up to 5 to 7 days in an airtight container or zip-lock bag. Raw, uncooked hotdogs should be cooked within 2 days of stuffing, or frozen immediately.
Freezer: Lay your poached and cooled hotdogs in a single layer on a sheet pan lined with parchment paper. Freeze them for about 2 hours until solid, then transfer to a freezer bag. This prevents them from sticking together, so you can grab one or two at a time. They’ll keep in the freezer for 2 to 3 months without any noticeable loss in quality.
Reheating from frozen: You don’t even need to thaw them. Drop frozen hotdogs into simmering water (not boiling) for 8 to 10 minutes, or grill them from frozen over medium heat, adding a couple of extra minutes to the cooking time.
Troubleshooting Common Homemade Hotdog Problems
Even experienced sausage makers run into issues sometimes. Here are the problems you’re most likely to encounter and how to fix them.
The hotdog is grainy or crumbly. Your meat got too warm during processing. Next time, make sure everything — meat, fat, grinder parts, mixing bowl — is ice cold. Add more ice water during the emulsification step.
The casing burst during cooking. You either overstuffed them or cooked them at too high a temperature. Fill the casings a bit less tightly and poach at 160–170°F, not in boiling water.
The flavor is bland. You probably under-salted. Salt is doing heavy lifting in a hotdog — it’s a flavor enhancer and a protein binder. Taste a fried sample of the raw mixture before stuffing, and adjust from there.
The hotdog has a rubbery texture. This can happen if you over-process the meat in the food processor. You want a smooth paste, but stop once it’s cohesive. Don’t let the food processor run for 5 minutes straight.
There’s no snap. If you used collagen casings or no casing at all, the snap will be less pronounced. For maximum snap, use natural sheep casings and give the hotdogs an ice bath immediately after poaching.
Why It’s Worth the Effort
Let’s be honest — making homemade hotdogs takes more time than ripping open a package. A full batch, from grinding to poaching, might take you 2 to 3 hours. So why bother?
Because the difference is enormous. The flavor of a homemade hotdog — made with fresh, quality meat and your own spice blend — is on a completely different level. There’s a depth and richness that processed hotdogs simply can’t match. You’ll taste the individual spices. You’ll notice how juicy the meat is. And that snap from a natural casing? Addictive.
There’s also the satisfaction factor. Sausage-making is one of the oldest forms of cooking — people have been doing this for thousands of years. There’s something deeply rewarding about turning raw ingredients into something this good with your own hands.
And if you’re someone who already enjoys food projects — maybe you’ve tried making homemade corn dogs or crispy golden french fries from scratch — adding homemade hotdogs to your repertoire feels like a natural next step.
FAQ
Do I need a meat grinder to make homemade hotdogs?
Ideally, yes. A meat grinder gives you the best control over texture and consistency. You can use a stand mixer attachment (like the KitchenAid grinder) or a dedicated manual grinder. In a pinch, you can ask your butcher to double-grind the meat for you and then process it at home in a food processor.
Can I make hotdogs without casings?
Absolutely. Shape the meat paste into logs using tightly wrapped plastic wrap, twisting the ends like a candy wrapper. Poach them in the plastic wrap at 160–170°F until they hit 160°F internally. Remove the wrap after cooling. They won’t have the classic snap, but the flavor will be the same.
Are homemade hotdogs healthier than store-bought?
They can be, because you control the ingredients. No fillers, no preservatives, no mystery ingredients. You choose the quality of meat, the amount of salt, and whether or not to use curing salt. If you want a lower-sodium or nitrate-free hotdog, you can make that happen at home.
How long do homemade hotdogs last?
Cooked hotdogs last 5 to 7 days in the refrigerator and 2 to 3 months in the freezer. Raw, stuffed hotdogs should be cooked within 1 to 2 days or frozen right away.
What’s the best wood for smoking hotdogs?
Apple and cherry woods are the most popular choices because they give a mild, slightly sweet smoke that complements the pork and beef without overpowering them. Hickory works too but has a stronger flavor — use it sparingly if you want the meat’s seasoning to stay front and center.
Your Next Cookout Just Got a Lot More Interesting
Once you serve homemade hotdogs at a backyard gathering, you’ll never hear the end of it. People notice. That first bite — the snap of the casing, the burst of juicy, well-seasoned meat — it’s a completely different experience from anything they’ve had before.
Start simple. Make a basic beef-and-pork blend with classic spices. Get comfortable with the process. Then start experimenting — try different spice profiles, play with smoking, test out wild toppings. The recipe is yours to own.
The tools are basic, the ingredients are affordable, and the results are genuinely worth every minute you put in. Your grill is waiting.